

INTRODUCTION
Endodontic mastery at its essence comes down to achieving high-quality, reproducible results without reliance on a particular instrument system (matching instruments, motor presets, matching paper and gutta-percha points, etc). Rather, endodontic mastery is derived from reliance on basic principles that can be applied to virtually any system of instruments or materials. In practical terms, this means adherence to literature-based and time-proven concepts. This clinical article was written to provide the general dentist with a set of guiding endodontic principles that can be implemented using any shaping and obturation system for the types of root canal procedures that will be commonly treated by general dentists performing endodontic therapy.
GUIDING PRINCIPLE 1: CASE SELECTION AND PREPARATION FOR TREATMENT
As a starting place, it is essential that the clinician perform a thorough endodontic examination and provide a pulpal and periapical diagnosis for every case prior to making access. This examination requires adequate radiographic assessment (possible CBCT and adequate diagnostic, 2D periapical radiographs); thermal testing as required; and assessment of percussion, palpation, mobility, and probings, all relative to controls.
Accompanying the aforementioned diagnosis, the clinician should obtain written informed consent. Ideally, this consent requires that the procedure be reviewed personally with the patient, risks discussed, questions answered, and alternatives given. Coincident to obtaining a pulpal and periapical diagnosis, the clinician should assess the iatrogenic risks of treatment (file separation in severely curved and calcified canals, extrusion of irrigants and filling materials in lower second molar apices that lie near the mandibular canal, and perforation in calcified canals, among many potential sources of risk). Prior to starting the case, profound local anesthesia must be assured. The rubber dam is the legal and ethical standard of care.
GUIDING PRINCIPLE 2: PREPARE AN ACCESS THAT PRESERVES TOOTH STRUCTURE AND PROVIDES VISUAL AND TACTILE CONTROL
The astute clinician takes a CBCT scan as indicated (in the presence of complex anatomy, vital anatomic structures, severe curvature, possible resorption, retreatment cases, etc). The CBCT scan can inform the clinician of the location of canal orifices, given the preoperative measurement tools embedded in the software. Adequate 2D periapical images prior to treatment can also help the clinician mentally imagine orifice locations. Preservation of tooth structure in access and canal locations is accentuated by using safe-ended burs under a surgical operating microscope (SOM) (EndoGuard [Komet], EX-24 [Mani], and others). Safe-ended burs allow removal of tooth structure on axial walls without gouging the pulpal floor (Figure 1).
Figure 1. EndoGuard (Komet). This safe-ended bur is used to plane axial access walls without gouging the pulp floor and unnecessarily removing tooth structure.
In relatively simple cases, opening into the chamber is straightforward. Severely calcified cases present challenges in canal location, providing an indication for CBCT. Attempting access into severely calcified pulp chambers and/or crowned teeth with obscured pulp chambers is highly problematic. Tipped and/or rotated teeth also present the clinician with perforation risk. Without significant experience and advanced visualization, ie, the SOM and CBCT, these teeth are best referred.
It is axiomatic that the clinician attempts to save as much tooth structure as possible during access and canal preparation to minimize the long-term risk of crown and root fracture. Specifically, it is critical to preserve pericervical dentin (4 mm coronal and apical to crestal bone). Caries may ultimately dictate how much tooth structure is removed, but the ideal access should be made first and followed by careful caries removal (often with a slow-speed CA round bur of an appropriate diameter). The use of a caries indicator is helpful to ensure complete caries removal. Assurance of straight-line access is optimal prior to entering files into a canal orifice, shaping the coronal third, and/or taking length measurements.
Canal location is generally straightforward in non-calcified cases, but in the daily practice of an endodontist, many non-vital cases are moderately to severely calcified, hence the need for specialty burs (EndoTracer [Komet], 1,500 to 20,000 rpm; 34-mm #2 CA burs [Mani]), which allow the clinician far greater precision in tooth structure removal during canal location relative to their short shank options (Figure 2).
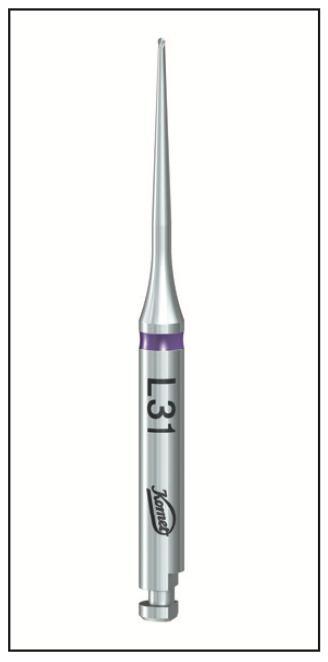
Figure 2. EndoTracer (Komet). These extended round burs are very help- ful in selectively removing tooth structure while attempting to locate calcified canals. Alternatively, ultrasonics would be another option for this purpose.
Alternatively, specialty ultrasonic units and tips can be used for this purpose. Ultrasonics are beyond the scope of this article, but if appropriate care is undertaken to avoid heat generation during their use, ultrasonics are a precise method for canal location in addition to exacting tooth structure removal. The Varios 970 (NSK) is the author’s preferred ultrasonic unit in combination with NSK tips. The unit features its own irrigant reservoirs, and the variation in power between the lowest and highest powers is notable. Alternative tips and units include those manufactured by Dentsply Sirona and Bonart, among many other manufacturers.
GUIDING PRINCIPLE 3: REMOVE RESTRICTIVE DENTIN AT THE ORIFICE AND IN THE CORONAL THIRD BEFORE MOVING APICALLY
Be it with the use of small Gates Glidden drills (#1 or #2) and/or NiTi orifice openers, opening the orifice, removing restrictive dentin, clearing the chamber, and providing clear and unmistakable orifices for file insertion has immense value. Orifice openers come in many forms, sizes, and tapers and include rotary, reciprocating, and Gates Glidden drill varieties. All of these have the same purpose, which is to define the orifice and provide files and irrigants unrestricted access to the more apical portions of the canal. Coincident with the steps above, it is critical to clear the chamber with sodium hypochlorite and water rinsing to avoid debris from apical movement.
Endodontics is a sequential process. Profound local anesthesia precedes access. Conservative access and unroofing the pulp chamber precede canal entry. Shaping the coronal third and defining the orifice precedes placing instruments into the middle canal third.
When shaping multi-rooted teeth, it’s immensely helpful (especially with novice clinicians) to do so sequentially because it aids in conceptualizing protocol. In practical terms, this means resisting the urge to place orifice openers and glidepath files into the apical third before the coronal third is shaped and irrigated. It is easy to lose track of where one is in the cleaning and shaping process if different files are taken to different canal levels in multirooted teeth simultaneously. Lack of flowing taper and canal transportation can easily result if the clinician loses sight of where he or she is in the preparation process and/or does not have a clear vision of the final desired shape.
GUIDING PRINCIPLE 4: NEGOTIATE THE CANAL TO THE APEX AND OBTAIN A TRUE WORKING LENGTH
Canal negotiation with hand files informs the clinician of the true calcification, curvature, apex size, 3D nature of the apex and canal, canal length, and exact position of the minor constriction. It is the authors’ preference to always precurve hand files and always start canal negotiation with a #6 hand K-file. In addition, hand files are inserted into a canal once and then discarded as they rapidly lose their sharpness. Hand files come in a bewildering array of cross-sectional designs, materials, and clinical attributes. As a result, making generic recommendations about which hand files to use for a specific clinical indication is challenging due to the ability to achieve a particular task with many different hand files. This said, for the vast majority of canals, the standard K-file (.02 tapered hand K-File [Komet], K-Files [Mani]) will provide the average general practitioner the ability to negotiate canals, prepare a glide path, and obtain a true working length with an apex locator (Root ZX [J. Morita], EndoPilot [Komet], ProMark [Dentsply Sirona], and more).
The above notwithstanding, the single greatest variety of hand files (designs, lengths, tapers) available commercially is represented by the line of instruments marketed by Mani Dental of Japan. The clinician is directed to Mani’s catalog of safe-ended hand files, stiff hand files for canal negotiation in calcified cases (D Finders), and tapered hand files, among many other hand file options.
Once precurved, in the presence of irrigant, the hand file should slide to the estimated working length, and the apex locator should read 0.0 (the position of the minor constriction), which is the most natural place to end shaping, irrigation, and obturation procedures. More specifically, instrumentation, irrigation, and obturation should end at the exit of the canal from the tooth with careful attention paid to the avoidance of extrusion of foreign materials beyond the constriction. Apex locator measurements are most accurately made in a dry canal (despite the manufacturer’s assurances to the contrary) with the largest file possible, taking care not to touch the file to metal during measurement.
GUIDING PRINCIPLE 5: CREATE THE GLIDE PATH
Glide paths can be created with K-files, with rotary NiTi instruments, and through the reciprocation of hand K-files, among other methods. Common glidepath instruments include PathGlider for FQ (Komet), PathGlider for ProcQ (Komet), ProGlider (Dentsply Sirona), and PathFile (Dentsply Sirona), among many others. A properly created glide path significantly reduces the possibility of NiTi file breakage and ensures a time savings in that shaping files should move easily to the true working length. The glide path should be made to the true working length with frequent recapitulation using hand K-files to ensure that the canal path remains open and negotiable. Recapitulation should be accompanied by frequent irrigation and canal flushing to maximize debris removal, allowing the master cone to fit to true working length.
Should a canal become non-negotiable where it was once negotiable, in all likelihood, either a ledge has begun or the canal is blocked with debris. Rather than forcing additional files apically, the clinician should stop, go back to smaller precurved hand files, and attempt to regain the canal path and/or irrigate the debris coronally. File separation, canal transportation, and a wide variety of iatrogenic events have as their origin an impatience to reach the apex, especially in the presence of a blockage. The use of a viscous EDTA gel, such as ProLube (Dentsply Sirona) or File-Eze (Ultradent Products), may be valuable in bypassing a ledge or negotiating around debris and facilitating removal.
Once a #15 hand file can spin freely at the TWL, the glide path is prepared, and the canal is ready for shaping. Many mechanized glidepath instruments are .03/15 in dimension. Once they are taken to the TWL, the glide path is prepared.
GUIDING PRINCIPLE 6: SHAPE AND DISINFECT THE CANAL
Given the steps taken above, if performed correctly, shaping should be a formality. The shaping file utilized should move to the apex with minimal pressure in the presence of an adequate glide path. Knowing the endpoint of shaping and the desired goal of irrigation provides strong clues as to when the clinician is done and the canal is ready for obturation.
Ideally, the canal is prepared when the canal can be adequately disinfected and obturated. The advent of laser disinfection (Waterlase [BIOLASE], LightWalker [Fotona]) and multisonic negative/neutral pressure systems (GentleWave [Sonendo]) have all allowed the disinfection of smaller prepared canal spaces relative to traditional methods (passive ultrasonic irrigation, sonic irrigation, mechanical agitation, negative pressure systems [EndoVac]). While an absolute superiority of any given irrigation method has not been shown in the literature, and no single regimen or system has been able to demonstrate absolute sterility in canals, it is fair to say that we are closer to this objective than ever before.
In the context of shaping, if irrigation is ideal and adequate with regard to volume, placement, activation, refreshment, and solution type, it is clear that irrigation is performing the disinfection step in the endodontic procedure and that removal of tooth structure is of secondary value in cleaning. Stated differently, removal of tooth structure allows for irrigants to enter canal spaces and perform removal of the smear layer, dissolution of tissue, and/or antibacterial functions. Traditional irrigation solutions have included sodium hypochlorite, 17% EDTA, and 2% chlorhexidine. Newer “2-in-1” irrigation solutions have emerged in the marketplace, such as Triton (Brasseler USA), which are stated to disinfect canals while simultaneously removing the smear layer.
Methods to shape the canal generally fall into 2 categories: rotary- and reciprocation-powered NiTi files. There are dozens of commercially available NiTi systems. The cases shown were prepared with both the Procodile Q heat-treated system (reciprocation) or the FQ system (rotary), both powered by the EndoPilot motor (Komet). One significant advantage of the EndoPilot motor relative to others is the optional setting for user control of forward and backward degrees of reciprocation. The unit also features a heat source and an apex locator built in, and added features include a gutta-percha extruder and ultrasonic capability (Figures 3 and 4).
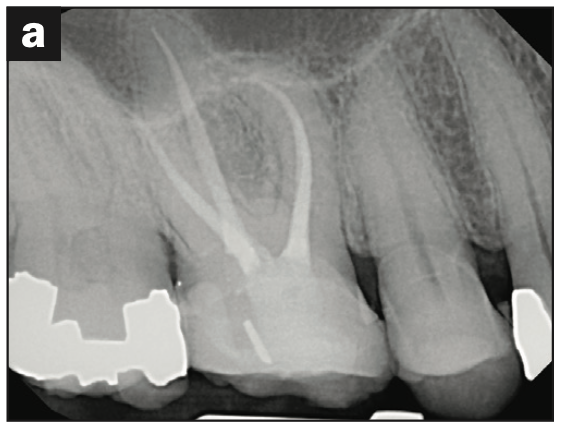
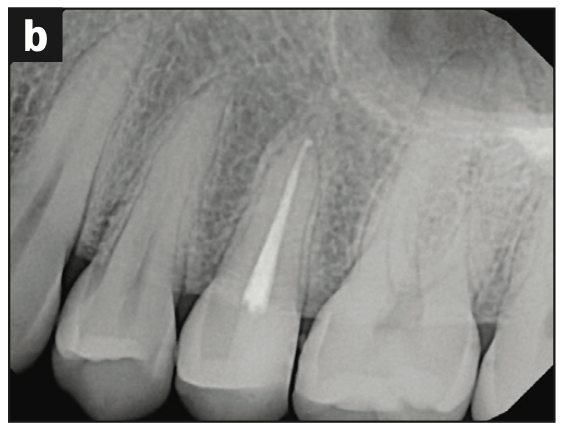

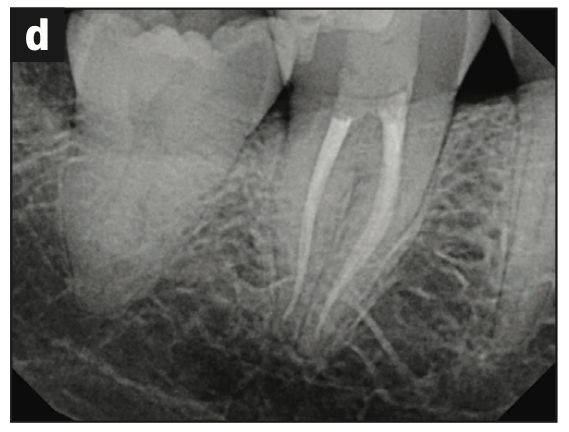
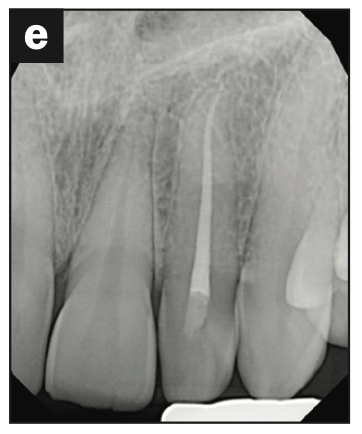
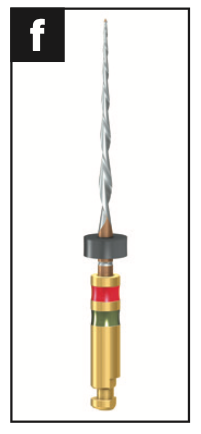
Figure 3. (a to e) Cases shaped using either the Procodile Q heat treated system (reciprocation) or the FQ system (rotary), both by powered by the EndoPilot motor (Komet). (f) Procodile Q (Komet).
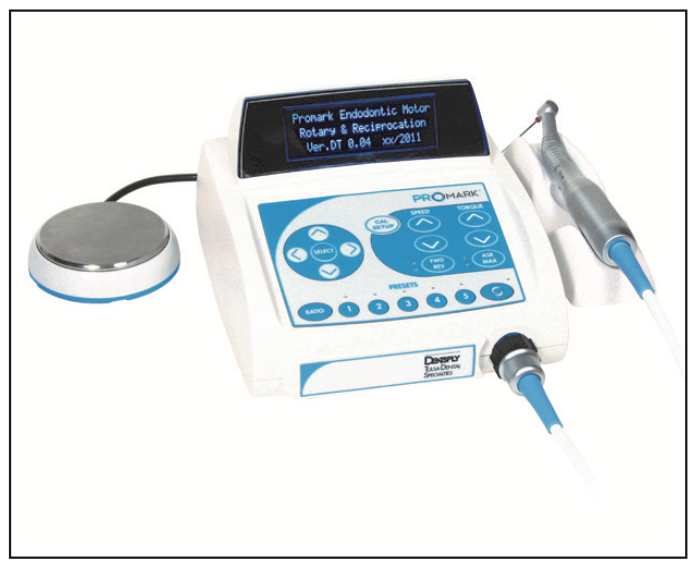
Figure 4. The ProMark endodontic motor (Dentsply Sirona) reciprocates and provides a rotary function with presets. The forward degree and reverse degrees of reciprocation cannot be user-modified as they can on the EndoPilot motor. ProMark motors typically are used with the WaveOne reciprocating system (Dentsply Sirona).
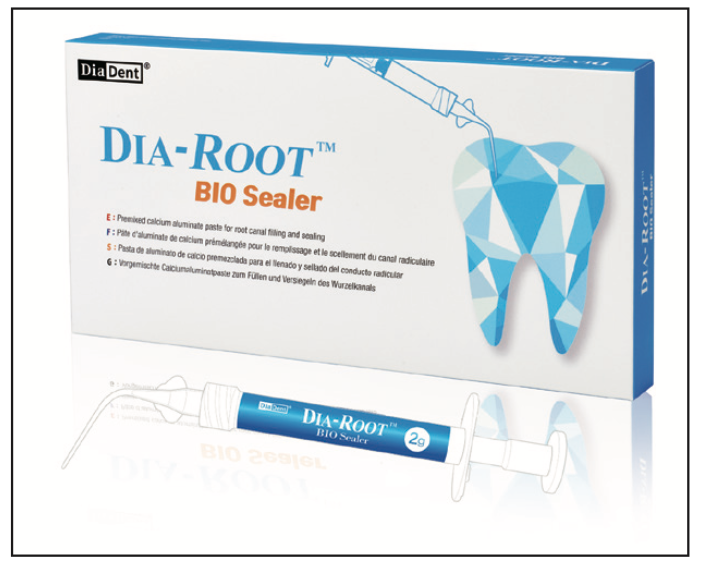
Figure 5. Dia-Root Bio Sealer (DiaDent) is a calcium silicate-based bioceramic sealer in the same general class as BioSeal (Komet) and EndoSequence BC Sealer (Brasseler USA).
In summary, preparing a canal space with narrowing cross-sectional diameters requires respecting the unique anatomy of the tooth. Maintaining the canal’s initial position, keeping the minor constriction at its original position and size, and appropriately sizing/preparing a canal space that can be predictably irrigated and obturated are the goals of canal shaping, regardless of the system used. In guitar terms, some players like Fender, some players like Gibson, and there is a universe of players who like other models. Which system is best is a matter of personal preference. What is critical is that the clinician knows his or her system, its attributes and limitations, and how to use it comprehensively from orifice to apex.
GUIDING PRINCIPLE 7: OBTURATION
Once the chosen irrigation/disinfection protocol has been achieved, the clinician should be able to dry the canal with paper points, fit a cone with a modest amount of sealer on it (ideally a calcium silicate sealer, such as BioSeal [Komet] or Dia-Root Bio Sealer [DiaDent], among many), and take a trial cone radiograph to assure that the master cone is in the correct position relative to the apex before obturation is concluded. All of the major instrumentation systems available at this time have matching paper points and gutta-percha points, whereby the master apical file (the largest file used at the apex) has a matching paper point and gutta-percha point. The cases illustrated using both Procodile Q and FQ (Komet) were obturated with this convenience (Figure 5).
It is beyond the scope of this article to discuss obturation. This stated, if the clinician is going to perform endodontics, it is essential to have a heat source and a source of extruded gutta-percha readily at hand. Reliable systems with these features include the Dia-Duo (DiaDent), Calamus Unit (Dentsply Sirona), and the optional attachments to the EndoPilot (Figures 6 and 7).
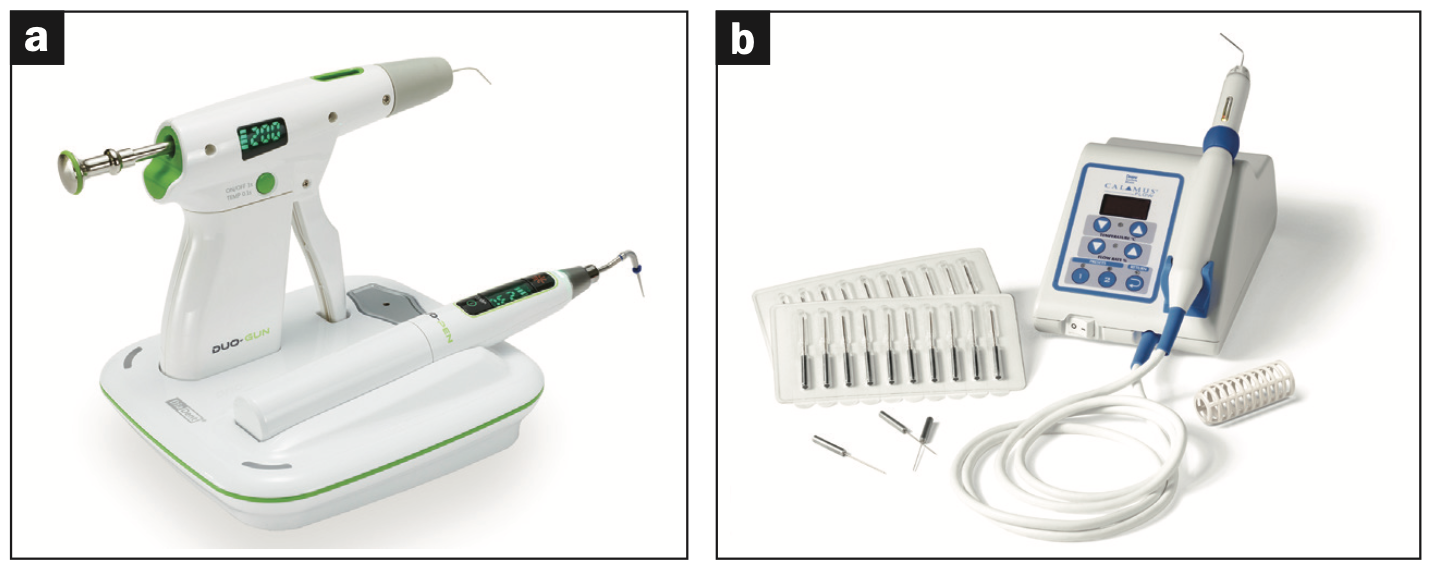
Figure 6. (a) Dia-Duo (DiaDent) is a cost-effective heat source with a smaller footprint relative to some other market options and a gutta-percha extrusion option. (b) The Calamus Unit (Dentsply Sirona) is a proven alternative to the Dia-Duo, but with a slightly larger footprint.
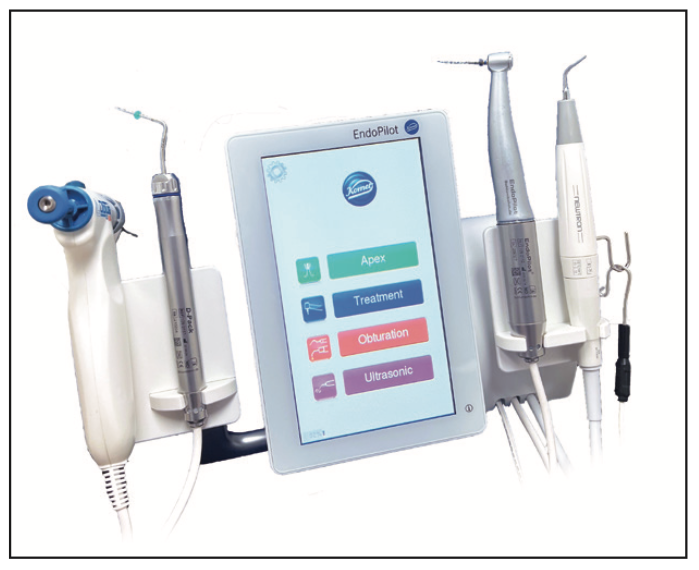
Figure 7. The EndoPilot motor has expanded capabilities to provide a heat source, an apex locator, gutta-percha obturation, and ultrasonics.
SUMMARY
This article has provided the reader a road map of steps on the road to endodontic mastery. Guiding principles that are independent of the material used have been presented. These principles include the critical importance of irrigation, removal of restrictive dentin in the coronal third, and achieving apical patency, among other key concepts. We welcome your feedback.
ABOUT THE AUTHORS
Dr. Neal earned his DMD degree from Roseman Dental School in 2023 and currently attends the GPR at Ohio State University. He can be reached at tylerhneal@gmail.com.
Dr. Mounce earned his DDS degree from Northwestern Dental School and received his endodontics certificate from Oregon Health Sciences University. He practices endodontics in Eagle River, Alaska. He is widely published in trade magazines and has lectured globally. He can be reached via email at
richardmounce@mounceendo.com.
Disclosure: The authors report no disclosures.