

INTRODUCTION
Advances in digital dentistry have greatly enhanced what dentists can do for their patients in the clinical setting by increasing efficiency and ensuring more predictable, favorable clinical outcomes. For example, the use of computer-aided design/computer-aided manufacturing (CAD/CAM) systems in dentistry, such as Dentsply Sirona’s CEREC CAD/CAM system for same-day single-tooth restoration, has increased dramatically during the last decade. Our office started moving in the digital direction in 2014 when we began using CEREC for single-tooth, fixed restorations.
More recently, we have stepped outside of using in-office systems just for single-tooth restorations and have begun using our scanners to work collaboratively with dental laboratories for more complex cases. We have gradually transitioned our removable restorations in that direction as a result of Primescan’s (Dentsply Sirona) capability to scan full arches accurately. Incorporating digital technology has made dental outcomes more predictable and has improved our patients’ experiences in many ways.
The transition for any patient from having teeth to having no teeth is a profound transformation that has physical and emotional ramifications. The most predictable way to prosthetically mimic Mother Nature is to place multiple implants and fabricate a fixed denture to achieve function, form, and aesthetics. For this particular multidisciplinary case, we partnered with dental lab technician Paolo Lubrano from Bespoke Dental Technologies (Milford, Conn) and an oral surgeon who could provide general sedation at a surgical center. Even with the advent of modern technology to assist in collaborating and coordinating treatment more easily over live video calls, it was important to choose a lab in close proximity to the practice. Due to the nature of the complex treatment that would necessitate conversion of a denture chairside on the day of surgery, I felt it was crucial for the best clinical outcome. The ability to have in-person meetings and for the patient to meet the lab technician, which would instill trust in the process, was paramount to the overall success of the case. We needed a lab technician who was able to attend, assist, and again convert the immediate dentures chairside on the day of surgery. This was the most complex and extensive case we have partnered on with a dental lab to date, and the results were exceptional.
CASE REPORT
In 2019, a 55-year-old male presented with multiple failing restorations, partial edentulism, multiple areas of decay, failing root canals, and periodontal disease (Figure 1). The patient not only desired a new smile but, more importantly, he also wanted to be able to function by being able to eat and chew comfortably. The patient was given an ideal treatment plan, alternative treatment options, and the range of fees associated with the respective options. He was also advised to do some reading and research on his own and to even seek another professional opinion due to the extensive, life-changing nature of the treatment and the substantial financial investment he would be making.
Figure 1. The patient presented with mul- tiple failing restorations, areas of decay, partial edentulism, failing root canals, and periodontal disease.
The patient was absent from the practice during the pandemic but returned in November 2022. At that time, he had already had a consultation with the oral and maxillofacial surgeon, Dr. David Solomon, and decided he would require sedation for the surgical phase of treatment. The treatment plan included placing 6 implants in each arch to support 2 full-arch zirconia prostheses.
Following the Xcell Implant Process, a technique developed by Dr. Jonathan Abenaim, the patient’s hard and soft tissues were digitally scanned with the Primescan. The scans, along with one fully retracted, full-face digital photograph and one full-face smiling digital photograph, were sent to the lab along with the preferred shade for the immediate dentures that would be 3D printed. Dentures would be printed preoperatively to be used as immediate dentures by the patient starting the day of the surgical extractions and implant placement.
In preparation for designing and printing the temporary full dentures, the images were superimposed into the 3Shape design software. This process enabled the lab technician to correct everything from the necessity of shifting or uprighting the midline to even leveling a natural cant, which was apparent when the patient smiled. The 2 full-face photos taken pre-op would be superimposed with the digital scan, enabling this process to occur easily and predictably.
After designing the temporary prosthesis (Figure 2), the STL file was exported on the Asiga composer, and prototypes for the upper and lower dentures were 3D printed on the Asiga Max using Rodin Titan (Pac-Dent) (Figures 3 to 5). The printing process for both arches took approximately 50 minutes. The same file was also printed in Keystone HardClear (Keystone Industries) with the occlusal of all teeth cut out, which would function as a surgical template. This would provide the surgeon with a guide for the hard-tissue boundaries where the implants could be placed.
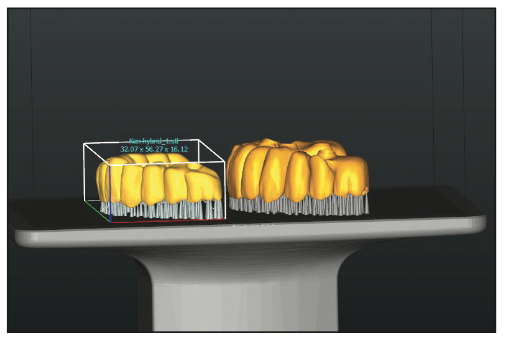
Figure 2. To ensure proper fit of the Rodin Titan (Pac-Dent) protype hybrid, the pro- totype of the hybrid was nested with the intaglio on the Asiga composer to design the prosthesis.
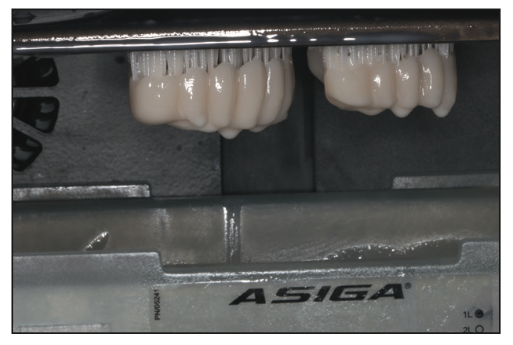
Figure 3. Rodin Titan temporaries 3D printed with the Asiga Max.
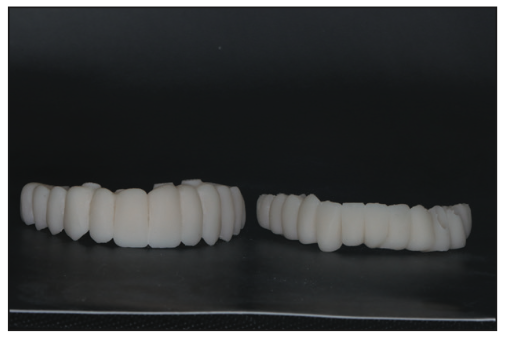
Figure 4. The hybrid temporaries were processed and cured.
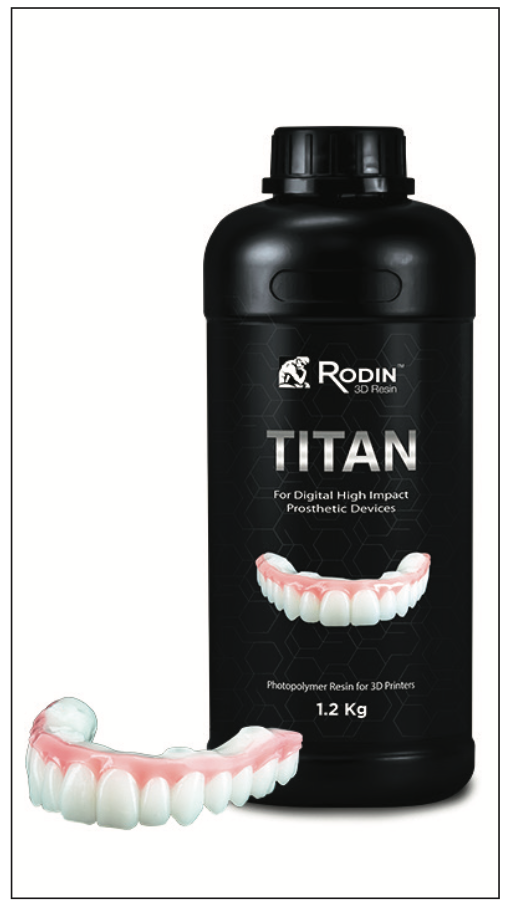
Figure 5. The Rodin Titan.
The Asiga Max features a smart positioning system that has a series of positioning encoders that read the precise position of the build platform during layering to ensure that each layer is formed accurately. It also has a high-power UV 385-nm LED, which cures faster at deeper UV wavelengths, helping to reduce overcure. It is an “open material” system, which means a wide variety of manufacturers’ materials (more than 400) can be used with it for 3D printing. Additionally, the touchscreen display is very user-friendly.
Choosing a Resin for the Temporaries
We chose Rodin 3D Resin (Pac-Dent) printing materials, which are FDA-registered, biocompatible medical devices. Rodin Titan (Figure 5) is a unique ceramic nanohybrid resin engineered to be used for full-arch restorations and provisional hybrid dentures. It shares the core composition of Rodin Sculpture, which is a newer class II ceramic nanohybrid with analogous ceramic filler content. Rodin Titan possesses a substantial increase in flexibility for greater impact strength. The increased flexural modulus is ideal for printing full-arch restorations such as split-file designs, full monolithic dentures, and immediate screw-retained dentures.
Titan’s formulation allows quick and accurate 3D printing and is available in 6 VITA shades (0M1, 0M3, B1, A1, A2, and A3) to enable the replication of natural aesthetics, including translucency and radiopacity. Restorations can be customized with acrylic-based, light-curable stain and glaze systems, like the Rodin Palette Naturalizing Kit (Pac-Dent).
Every resin formulated for 3D printing has a specific method for post-processing. Rodin is unique because it is rinsed for just a second in isopropyl alcohol. A spray bottle containing isopropyl alcohol was used to lightly spritz the prototypes. After air drying, they were sprayed a second time and allowed to air dry again. The next step was to light cure them in an Otoflash G171 Curing Light with nitrogen gas for a 4,500 total flash output. According to the manufacturer, the Otoflash UV is a little stronger than that of other light-curing boxes.
Next, the prototype was glazed (OPTIGLAZE Color [GC]), which was set by undergoing 200 flashes under nitrogen in the Otoflash. The temporary was then characterized by staining and glazing to achieve as natural a look as possible (Figure 6). Generally, this involves applying a clear coat of glaze followed by adding a little brown for character, blue for translucency, and perhaps some white. The prototype was then light-cured again for 200 flashes as a final set for the glaze (Figure 7).
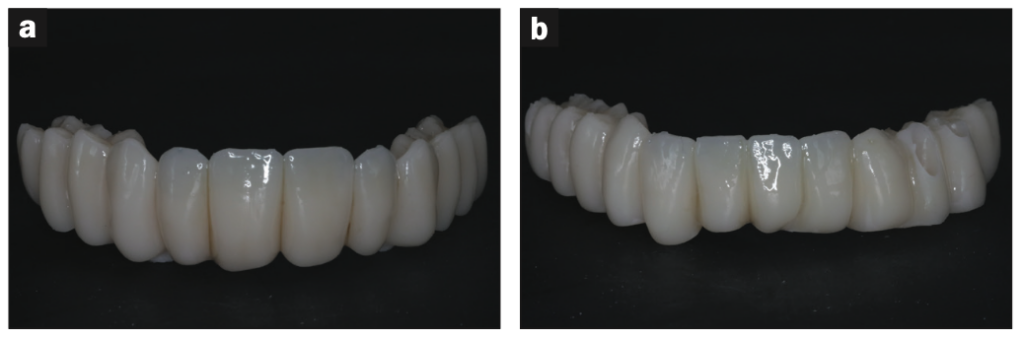
Figure 6. (a and b) The hybrids after staining and glazing with Rodin Palette (Pac-Dent).
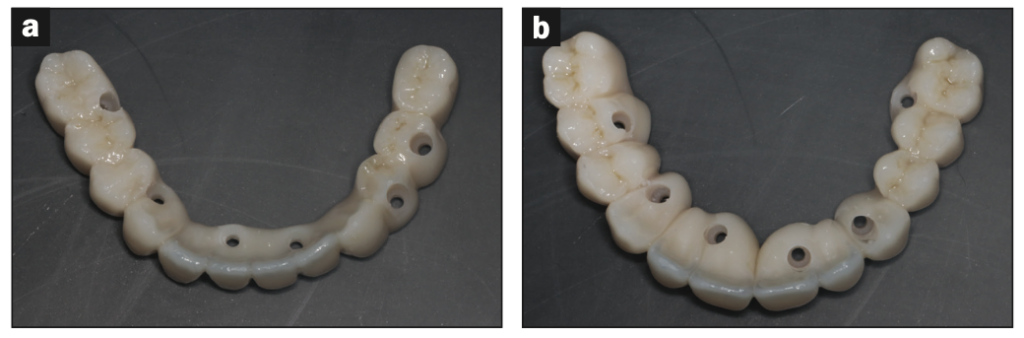
Figure 7. (a and b) Occlusal view of finished temporaries.
Day of Surgery
With the restorative dentist and lab technician present, the oral and maxillofacial surgeon removed the patient’s remaining teeth under general anesthesia in a surgical center. Twelve Biomet 3i platform-switching implants (5/4 and 4/3), 6 in each jaw, were immediately placed referencing the free-hand guide created in the lab. Multi-unit abutments (MUA) were placed on the implants on the day of surgery for ease in restoring the case. This helps the tissue to heal and adapt around the MUA and eliminates the need for a more involved, subsequent “uncovery” appointment, which may include the potential need to cut the tissue.
When the patient awoke from sedation, 2 temporary immediate dentures were ready to be converted into hybrids and fixed in the mouth (Figures 8 to 12). The patient was thoroughly instructed pre- and postoperatively to adhere to a liquid and soft diet until the implants were fully integrated, typically for a period of 4 to 6 months.

Figure 8. The temporary hybrid on the day of insertion and after healing.
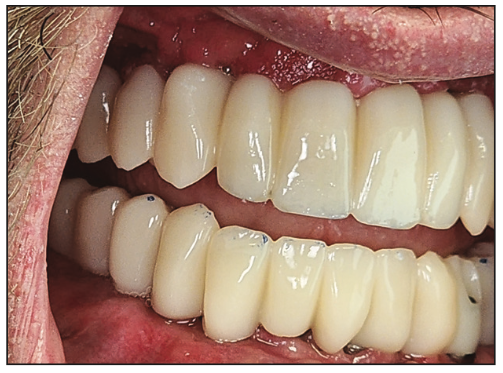
Figure 9. Profile with the temporary hybrid on the day of insertion.
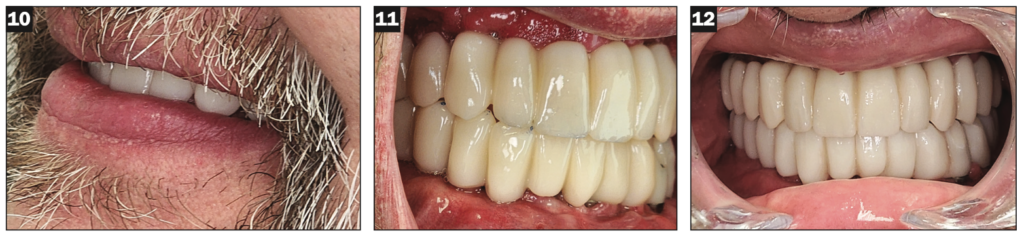
Figures 10 to 12. Retracted view of the temporary hybrid in place.
Final Scans
When integration was complete, the converted dentures were removed, the MUA healing caps were removed, and JA scan bodies (Dr. Jonathan Abenaim—Xcell Implant Process) were placed. Digital scans of the upper and lower arches were then taken using the Primescan.
The JA scan bodies are made of titanium and have a simplified geometry and size. They were designed to enable scanning the full arch quickly and accurately with any intraoral scanner. They were also designed to be used as healing abutments. These scan bodies were left on the MUAs during this short period of time, and the dentures were relined with a soft reline material (GC Reline II [GC]) so that the JA scan bodies could be captured. This allows for less chair time, less retrieval of components in and out of the mouth, and better retention of the temporary denture. These scan bodies could have even been placed on the MUAs at the time of surgery and scanned on the day of surgery. Still, in this particular case, this workflow was not utilized due to the nature of the surgery being completed under sedation in a surgical center.
The scans were sent to the lab, where the scan bodies were aligned using 3shape software, and the final prosthesis was designed. At this stage, the bite, midlines, mold form, size and shape of the teeth, and the natural-looking aesthetics of the teeth were incorporated into the design. This is a crucial difference in the workflow that is a game changer for the clinician with regard to chair time and cost. We are now able to print implant-retained temporary prostheses using temporary materials.
For this patient, the temporaries were 3D printed using Rodin Titan in the Asiga Max printer and glazed using Rodin Palette. At this point, PMMA temporaries of the maxillary and mandibular full-arch prostheses were printed in less than an hour per arch. This temporary does not have any Ti-bases and can be completed very easily and cost-effectively. We are able to allow the patients to wear these temporaries for periods of time to work out their function, parafunction, form, and phonetics, as well as to confirm their aesthetics. We can very easily scan any changes, such as wear patterns that have been established over time or adjustments to the length of anterior teeth made by the clinician chairside in the temporaries, and remake a new set if the clinician and/or patient desires. Any changes can then be confidently converted to zirconia in the final prosthesis.
Choosing the Screw-Retention System
We chose the Powerball screw and its corresponding scan bodies system for the various reasons mentioned above. One of the main advantages is that it can be used to fabricate Ti-base-less prostheses. This means that the MUA can be connected directly without the use of a titanium base. It is the first patented screw designed for full-arch zirconia/PMMA/resin prostheses.
Historically, the issue with the design of traditional zirconia prostheses has been that they have not been able to connect directly to the implants without using a Ti-base. The prostheses were implant-level fixtures, and connecting the prosthesis directly to the implant could only be accomplished with a Ti-base. With the Powerball screw process, the MUAs are put on the implants, and the prosthesis is connected directly to them. Then the Powerball screw connects directly into the MUA, eliminating the Ti-base.
Not having a Ti-base on the prosthesis means less restorative space is needed. This, in turn, means that a stronger prosthesis is fabricated, and the fear of a debond of a Ti-base from the prosthesis and/or fracture of the Ti-base or the zirconia is eliminated. In addition, the edges of the screw are rounded to allow easy milling and the correct union of the screw and the corresponding prosthesis. Facial screw access is no longer a reality, as the screw allows for up to a 30° angle correction. Another advantage of the system is that the head of the screw uses a proprietary screwdriver that allows torque to be achieved without causing stripping of the head.
Another favorable aspect of this change in protocol is that it is less catastrophic if an issue requires removing the prosthesis. For instance, if a Ti-base debonds, the prosthesis must be removed and recemented chairside, and that is if the prosthesis did not break. If a screw fractures, it would be within the implant, whereas if a screw fractures in this system, it would be in the MUA, which can be removed more easily while preserving the prosthesis. Another drawback to Ti-bases is that if excess cement is left around a Ti-base, it could lead to peri-implantitis.
For these reasons, this is a more patient-friendly system. Parts can be replaced more easily and in less time, and patients will not be without their prostheses for days while dental labs remake them. This system saves both clinicians and patients a significant amount of time and money.
After the prototypes were inserted, the bite was equilibrated chairside, and some minor design concerns were addressed. A second set of temporary prostheses was in place for 2 weeks, and then wear and chewing patterns were checked. Those were scanned, superimposed over the design in 3Shape, “bio-copied,” and adjusted for in the design of the final zirconia (ArgenZ HT+) prosthesis.
The patient was thrilled with the temporaries and even happier with the final dentures and the final aesthetic results (Figures 13 and 14).
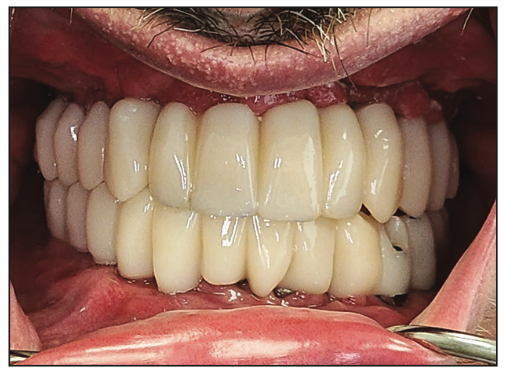
Figure 13. Final zirconia prosthesis (ArgenZ HT+).
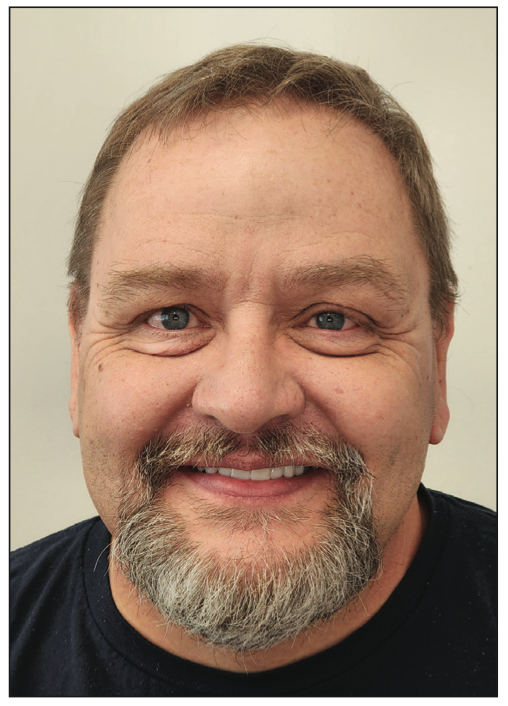
Figure 14. The patient with tears of joy in his eyes.
CONCLUSION
The result of following a digital workflow, specifically the Xcell Implant Process, is that it is a more predictable, cost-effective, and time-saving process that allows an advanced dental procedure to be easily accomplished by the general practitioner with proper training. The digital workflow is seamless, and the resulting accuracy will guarantee that the prosthesis fits without distortion. It has eliminated many clinical steps and appointments, including physical models; the introduction of inaccuracy by having multiple models; the use of verification jigs; and the necessity of using costly and multiple implant parts, such as cylinders and/or Ti-bases.
In addition, multiple PMMA temporaries can be fabricated easily and inexpensively until aesthetics and occlusion have been worked out to the patient’s and clinician’s satisfaction. These PMMA temps can even be fabricated chairside if the clinician has an in-house printer and the appropriate software. Resins such as Rodin Titan were used successfully and proved to have adequate strength and aesthetics for full-arch temporary prostheses.
Because of the complex nature of this case, it was important to collaborate with a local lab. It should be noted that this was Bespoke’s first digital workflow for a hybrid case and the process went as smoothly as it would have with a seasoned lab due to the simplicity of the XCell Implant Process and use of the Powerball screw.
ABOUT THE AUTHORS
Dr. You graduated from the University of Alabama at Birmingham School of Dentistry and completed a General Practice Residency at St. Francis in Hartford, Conn. She practices general dentistry and now owns a private practice in New Haven, Conn. She can be reached at dr.you@lumos.dental.
Mr. Lubrano is a master ceramist who graduated from dental school at the University of Perugia in Italy in 2010. After working in the clinical area of dentistry, Mr. Lubrano fell in love with the artistry of the lab business. His passion for ceramics and lab work grew as he learned more about implants and the digital workflow, and he has taken many courses over the past 10 years to develop his craft, which also led to involvement in guided surgery for simple and complex cases. He later became a KOL for ZimVie Dental and Asiga. He can be reached via email at p.lubrano@bespokedentallab.com.
Disclosure: The authors report no disclosures.