

INTRODUCTION
Technological advancements continue to evolve the capabilities of our society. In healthcare, it allows us to discover pathology earlier so that we can be less invasive and people can live longer, healthier lives. The dental industry is no different in that technology continues to advance the level of care we can provide to our patients. Providing our patients with modern diagnostic technology allows us to provide less invasive dental procedures, which typically offer better longevity for our restorative materials and potentially save more tooth structure. Patients may experience less dentistry in their lives, and because of it, their teeth may be functional and present for more years or their whole lives.
Less invasive preparation designs are achievable by finding the pathology earlier. Smaller preparation designs have many benefits for both the dentist and the patient. A smaller preparation design can benefit the tooth by obviously maintaining more of it for the future. However, it also benefits the dentist in that the cavosurface and proximosurfaces might still have enamel present, which relates to a potentially longer-lasting bond to the tooth, creating better longevity. The preparation design may also stay supragingival when found earlier, making it easier to place with less risk of contamination. It will also be easier for the patient to cleanse once placed, potentially contributing to better longevity of the filling material and tooth. When dentin is exposed, it would be superficial dentin, which has been shown to have the highest bond strength of anywhere on tooth structure. A small preparation design, as it relates to occlusion from the opposing dentition and wear or damage from mastication, could also be substantially longer-lasting. This is due to less force being placed upon it by having more tooth structure around it to take the brunt of the masticatory forces. However, all of these benefits don’t come without some level of difficulty. Hence, technological changes with current materials and techniques have become of interest. When creating smaller preparations within the tooth, it becomes more difficult to place traditional restorative materials. Current materials and matrix devices are either too thick or too curved to place interproximally when small amounts of tooth structure are removed. Rather than remove more healthy tooth structure to create space to place traditional restorative materials and matrix systems, we can instead utilize new devices and various restorative materials that simplify the filling process. This also creates final restorations that have improved strength and/or bioactive properties to help fight off cavities and strengthen the tooth structure. Four different cases are presented here that highlight the materials and devices being utilized to provide minimally invasive, modern, or bioactive restorations.
CASE REPORTS
Case 1
By utilizing the latest diagnostic technology in dentistry, we can better understand what is happening to the tooth structure’s crystalline structure so that we can either monitor the tooth or try to remineralize it. We can have earlier intervention to create minimally invasive preparations so that there is less amputation of tooth structure. Two types of modern diagnostic technology were implemented. The first technology is The Canary System (Quantum Dental Technologies) (Figure 1) and the second is modern digital radiograph evaluation (DEXIS) (Figure 2). The Canary System is a low-level laser diagnostic tool that quantifies the tooth’s crystalline structure, providing a numerical value and an audible notification for the patient and practitioner to hear. It was determined that there was damage to the crystalline structure of the tooth when a numerical value of 39 was found on the distal of tooth No. 21, which relates to the presence of a cavity.
Figure 1. The Canary System (Quantum Dental Technologies).

Figure 2. DEXIS Digital Radiographs with the Nomad Cordless x-ray head.
The CariVu transillumination diagnostic device (DEXIS) (Figure 3) is another tool that can be implemented. The transillumination of the tooth structure utilizing live video- and photo-capturing technology allows the clinician to see in real time what is happening within the tooth structure. Once a defect within the tooth is found, a photo can be captured from the live video for the patient to see. It was evident from the CariVu image that decay was present on the distal of the tooth and extending into the superficial dentin (Figure 4).
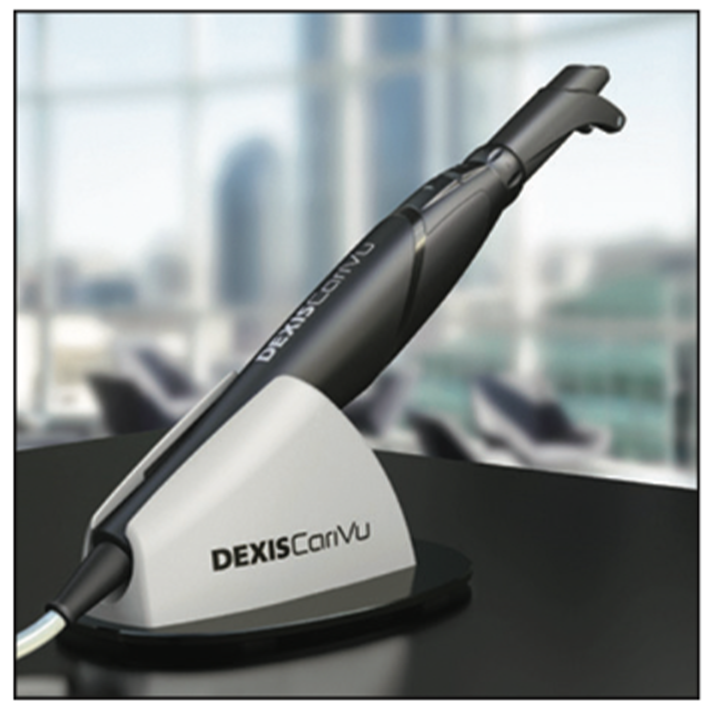
Figure 3. CariVu (DEXIS) diagnostic device.
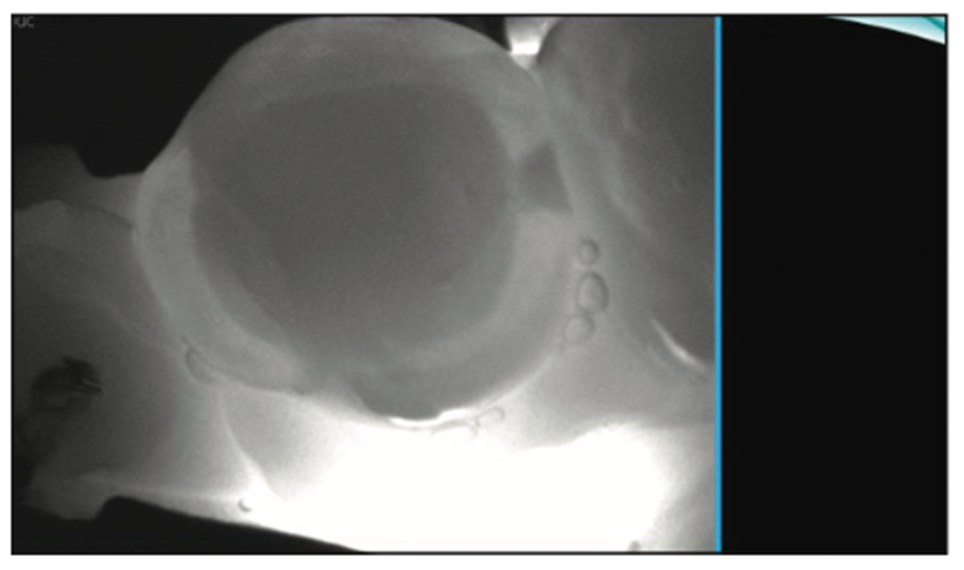
Figure 4. CariVu image showing distal decay extending into the dentin.
Radiographic interpretation can often be lacking. For example, in this case, a small defect may be noted on the digital radiograph, which could cause some practitioners to misdiagnose the cavity or visually not see the cavity. When evaluating the teeth using the CariVu, the decay that is noted from The Canary System is further verified, allowing the practitioner and patient to see the distal decay requiring removal. The ability to find pathology earlier and intercept it with smaller preparation designs, small matrices, and new injectable composites, as well as the ability to utilize remineralization techniques or minimally invasive preparation designs, is better in comparison to traditionally more invasive modalities.
Furthermore, radiographs lack the ability to view the location of tooth decay spatially from buccal to lingual. We can only perceive decay on the radiograph once enough damage is present, and we can only see its location from occlusal to gingival. When it comes time to prepare the tooth, the interproximal decay is often found by cutting through healthy tooth structures until we locate the decay. Then, based on one’s preparation design and matrix system, additional healthy tooth structure can be removed buccally and lingually to create space for placement of the matrix and materials.
The ability to look down on the tooth from above with a CariVu gives us a spatial orientation that radiographs cannot provide. Knowing where the tooth decay is allows the dentist to be more conservative in his or her preparation design with less removal and exploration to find the tooth decay (Figure 5). Once found, the decay can be further accessed for any remnants with various intraoral cameras and caries indicator solutions.
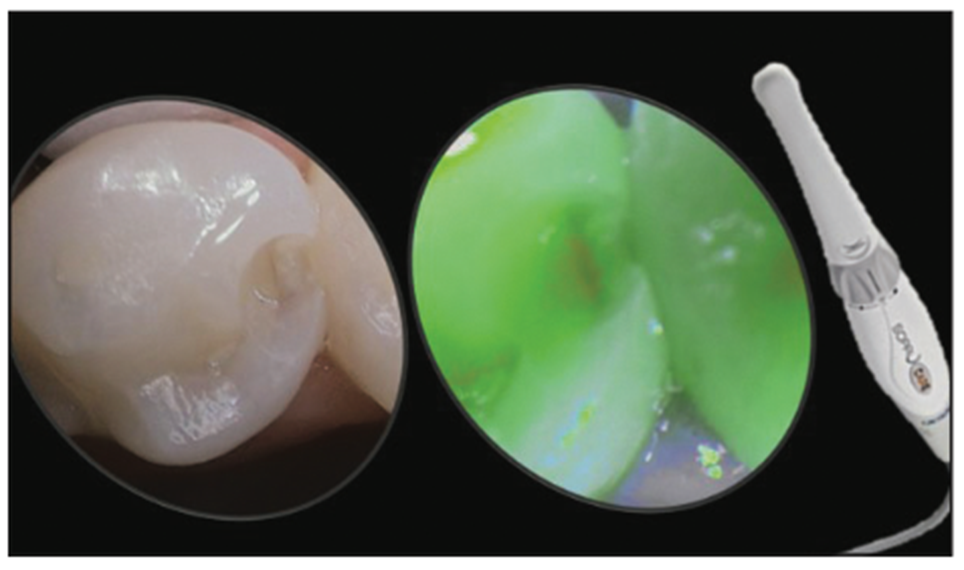
Figure 5. Finding and uncovering tooth decay. Remaining damage can be evaluated with various intraoral cameras and caries indicators.
Another area of concern when working interproximally is the prevalence of iatrogenic trauma to adjacent teeth, which often happens during direct and indirect restorative procedures. The removal of healthy tooth structure from adjacent teeth can leave the tooth rough, which can allow bacteria to colonize, and potentially exposed to future tooth decay via easier access because of a lack of protective enamel on the tooth. Furthermore, altering the emergence profile of the tooth can create future problems when trying to recreate ideal interproximal contacts, which, when done incorrectly, may give rise to additional tooth decay and gum disease. It is for this reason that there are devices available to help protect the adjacent teeth while allowing the practitioner to make smaller, less invasive preparation designs (Figures 6 and 7). Various types of metal shim devices can be pushed between the teeth such that they create a metal wall or barrier shielding the adjacent tooth from any accidental bur strikes. They can also be used when preparing teeth for indirect restorations. This allows the practitioner to make smaller, less invasive preparations without damaging adjacent teeth, and creating a smaller preparation allows for faster placement of restorative materials.
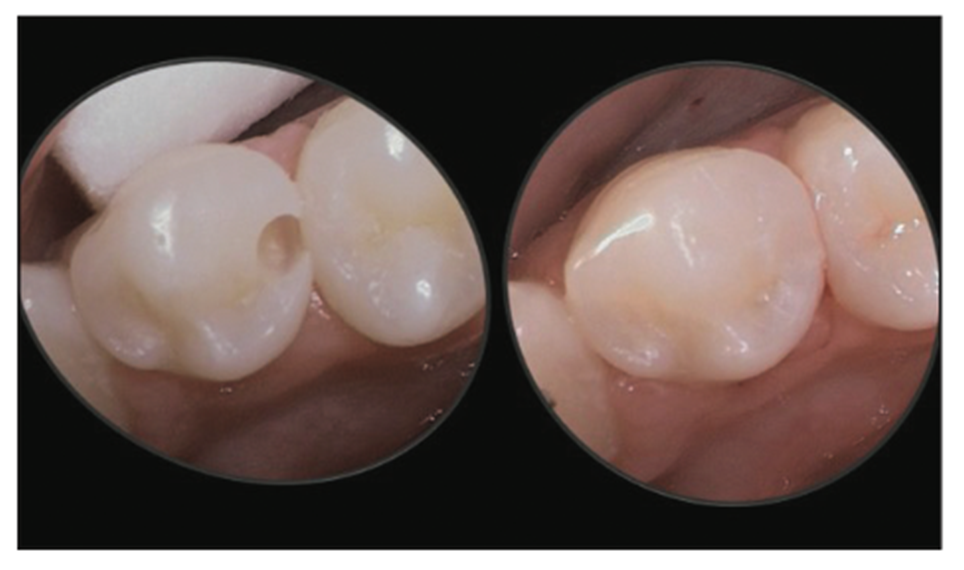
Figure 6. Removal of only the damaged tooth structure without causing iatrogenic trauma to adjacent tooth structure.
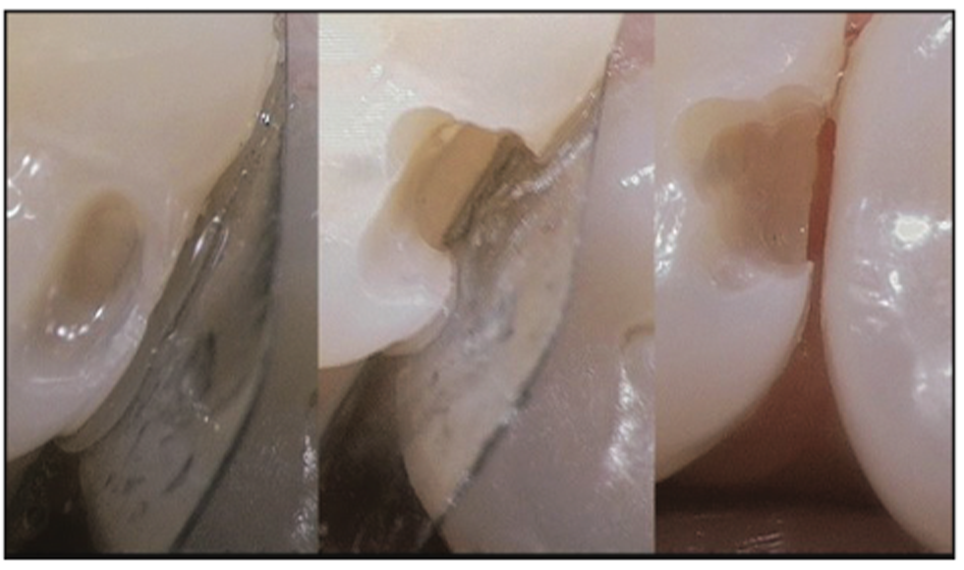
Figure 7. Showing metal shim/barrier to prevent damage to adjacent teeth.
Case 2
A 44-year-old patient presented with a small chip out of his tooth No. 14, along with visibly apparent staining or small decay. Radiographic evaluation showed no lesion between the teeth (Figure 8).
A rubber dam was placed for the patient’s comfort and for isolation of the tooth structure to facilitate a clean, dry field of view and the application of materials (Figure 9). Although a visible defect could be seen, both the CariVu and Canary System could have helped to confirm the presence of decay even though it could not be seen on a radiograph. Placing an interproximal guard (FenderWedge [Directa USA – Division of Directa Dental Group]) prevented us from causing iatrogenic trauma to the adjacent tooth.
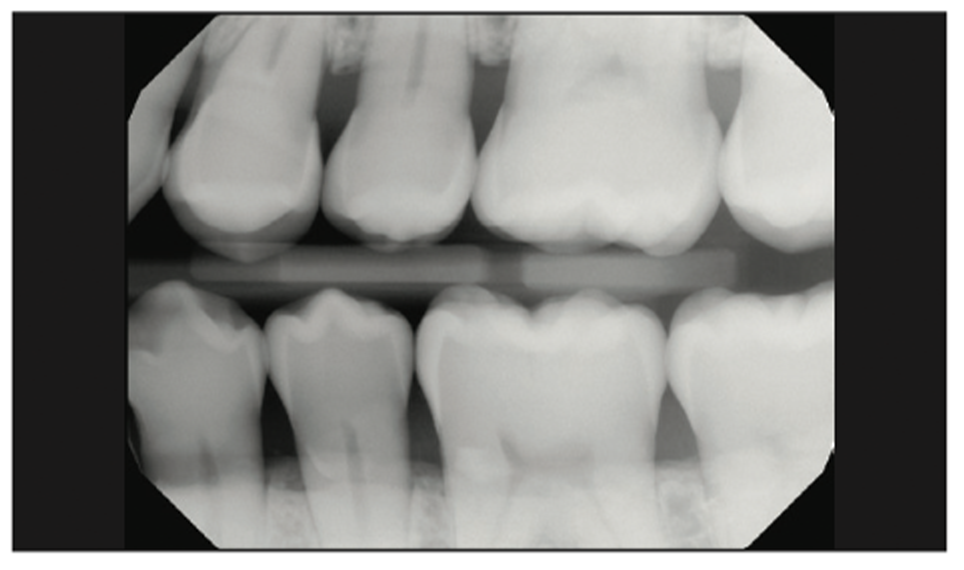
Figure 8. Radiograph of teeth Nos. 13 and 14 showing no signs of tooth decay interproximally.
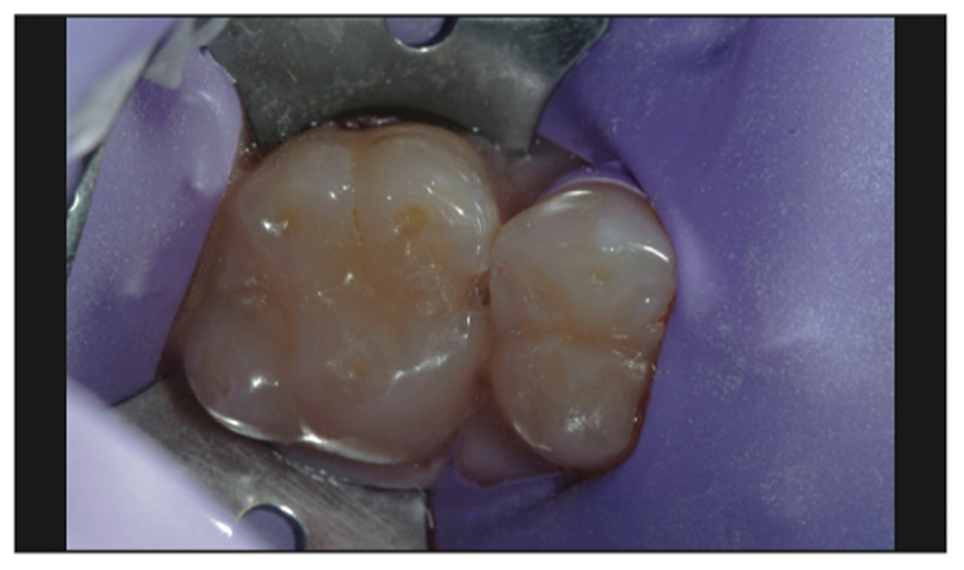
Figure 9. Initial appearance of tooth structure with rubber dam in place.
Notice the decay for this case was inside the tiny defect on the imagery, which is where we started the preparation design, but we could also have used a groove or pit in a tooth if there was no visible defect to guide us. We then extended apically until we removed the cavity and demineralization. Once done, we moved laterally only to remove decay and demineralization but no additional healthy tooth structure.
Preparation of the cavity was done utilizing a small, pear-shaped diamond bur (Aesthetic Dental Designs Preparation Kit [Komet USA]) in an electric handpiece (EXPERTmatic E25 [Kavo]) at 20,000 rpm under water spray. Due to the high torque, lower speeds can be utilized to minimize friction and vibrational damage or fractures to the surrounding healthy tooth structure. The initial removal of decay showed the decay was larger than what was perceived visually at the start of preparation and the decay could not be seen on the radiograph (Figure 10). Had it not been for the tiny chip in the tooth the decay would not have been found by traditional radiographic examination. Hence additional tools are necessary to find pathology and cavities.
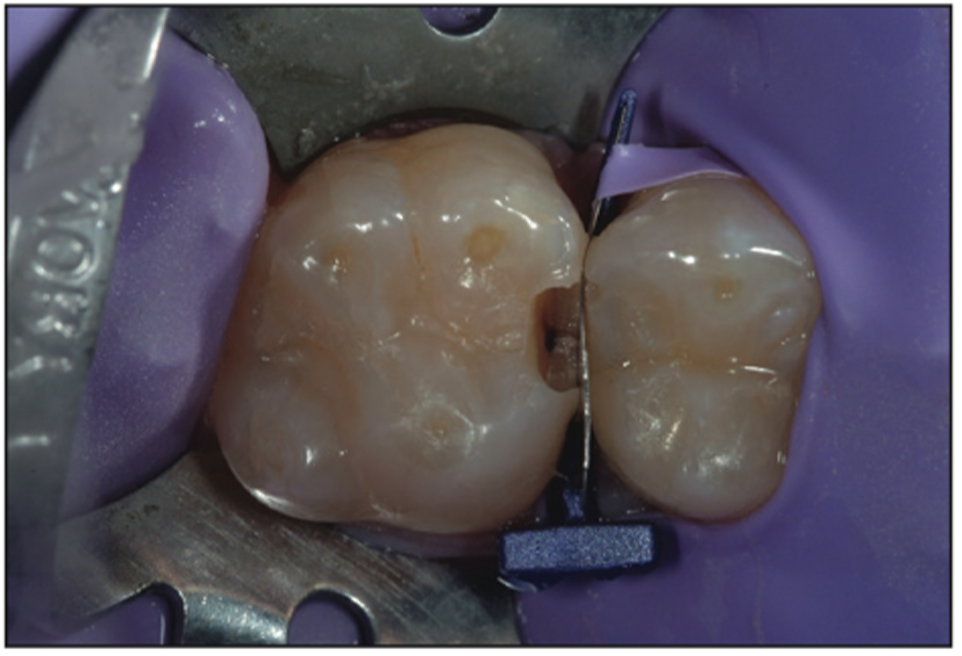
Figure 10. FenderWedge (Directa USA – Division of Directa Dental Group) in place to protect the adjacent tooth.
Even with the aid of magnification loupes (Carl Zeiss Meditec), which shows that the tooth decay had been completely removed, we still chose to implement a caries indicator (Kuraray), which helped us see a faint amount of decay still present on the axial wall (Figure 11).
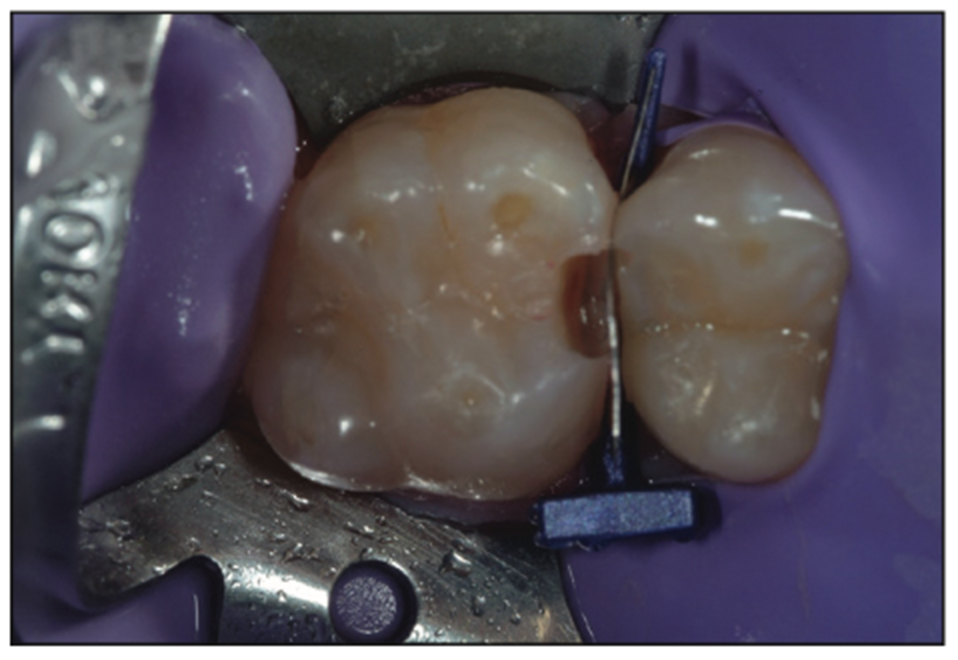
Figure 11. Caries indicator showing a small remnant of damage.
At this point, based on the size of the preparation design from the removal of the tooth decay, there were many options as to how to fill the defect. Because the preparation design was so small and there was minimal change to the tooth and the interproximal area, the FenderWedge that had been used had already caused tooth separation because of the wedging effect, in addition to the displacement caused by the metal band that separated the teeth. This separation provided enough displacement to create a tight contact for many small defects. Although this FenderWedge does not have the same shape as the tooth, it is typically adapted well because of the limited preparation design. It is a standalone device to use as a matrix to recreate the tooth shape and function as a form to hold the new restorative material in place.
If the preparation is too large, there would be a lack of adaptation to the tooth structure, which would necessitate using a different matrix to create the interproximal contact. Many of the traditional sectional matrix systems have evolved and worked very well to create tight contacts interproximally because of their ability to create displacement between the teeth. The ring systems provide the advantage of using contoured sectional matrices to recreate anatomical interproximal contacts. However, if pathology is small, many, if not all, of the contoured matrix bands used in the sectional ring systems are unable to be placed interproximally due to the lack of space for the contoured band to be pushed into position. So either additional healthy tooth structure has to be removed to facilitate placement of the sectional matrix and its ring system, or a different device must be implemented to create the contact.
A few new technologically different materials that are implemented regularly in our practice offer unique benefits. When we have a defect that requires strength in a material, we will use the G-ænial injectable composite line (GC America). The 3 different viscosities, Flo X, Universal, and Bulk, provide unique benefits because of new technology. New, finer nanofillers, with a high-density resin and a new full-coverage silane coating, deliver higher physical strength, better wear resistance, and improved handling. They have a high flexural strength, ultra-high wear resistance, and durability that many traditional composites cannot offer. Additionally, they have low shrinkage stress and low volume metric shrinkage, which provides better marginal integrity.
Because of the small size of the defect and the presence of lots of enamel and superficial dentin, a self-etch or selective-etch technique for resin adhesives is not recommended. Self-etch cannot adequately condition and adhere to the enamel; it’s virtually impossible not to touch the dentin using a self-etch technique. Hence, a total-etch technique was implemented. Using a 38% phosphoric acid on the entire preparation for 15 seconds (Figure 12) and then thoroughly rinsing it away, followed by light air drying, maintained moisture in the dentin so as not to cause a collapse of the collagen fibers. Next, a universal bonding agent (All-Bond Universal [BISCO]) was placed (Figure 13) following manufacturer protocols and by placing multiple coatings to be certain that it had been thoroughly coated. Next, the volatile solvents and water were evaporated carefully using an air-water syringe for 10 seconds with gentle air. This was followed by a 10-second cure using a modern LED curing light (VALO Grand [Ultradent Products]) (Figure 14). The G-ænial BULK injectable composite (GC America) was placed next because of its ability to be up to 4 mm in depth and because it does not need a capping composite (Figure 15). Having placed the G-ænial BULK injectable composite and cured for 20 seconds with the VALO Grand LED light, you can see the contact that was formed by the FenderWedge (Figure 16). Once the FenderWedge is removed, any excess flash can be easily removed with a Composite Ninja (Clinician’s Choice) or other sharp interproximal knives (Figure 17). The small preparation size lends itself to have minimal flash cleanup as well as minimal to no occlusal adjustment being needed. After the removal of any excess composite and polishing with points or cups, the final minimally invasive restoration can be seen in Figure 18.
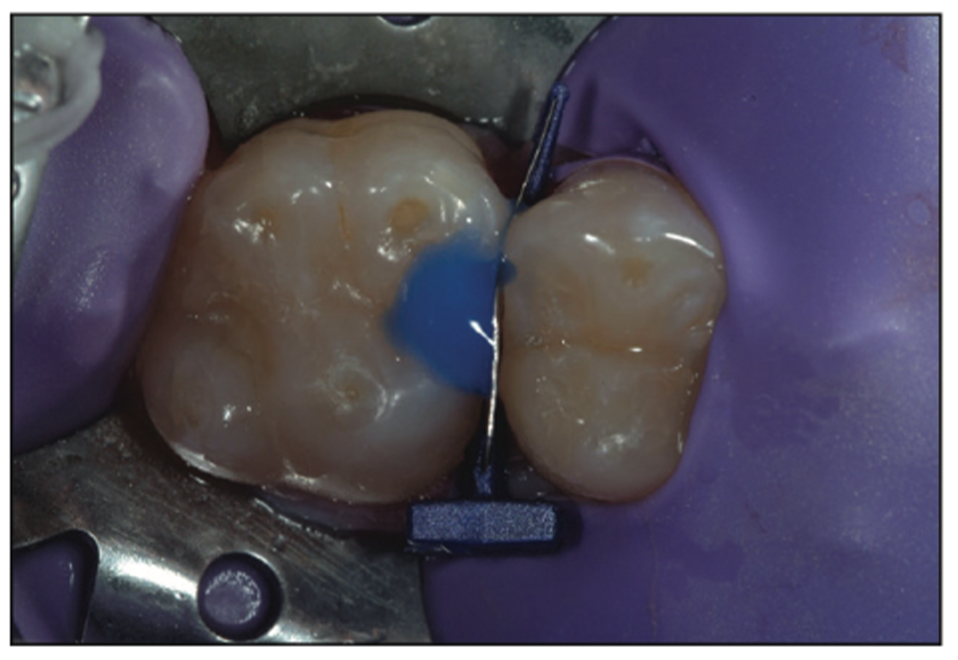
Figure 12. A 38% phosphoric acid was placed to etch the tooth structure.

Figure 13. A universal bonding agent (All- Bond Universal [BISCO]) was placed.
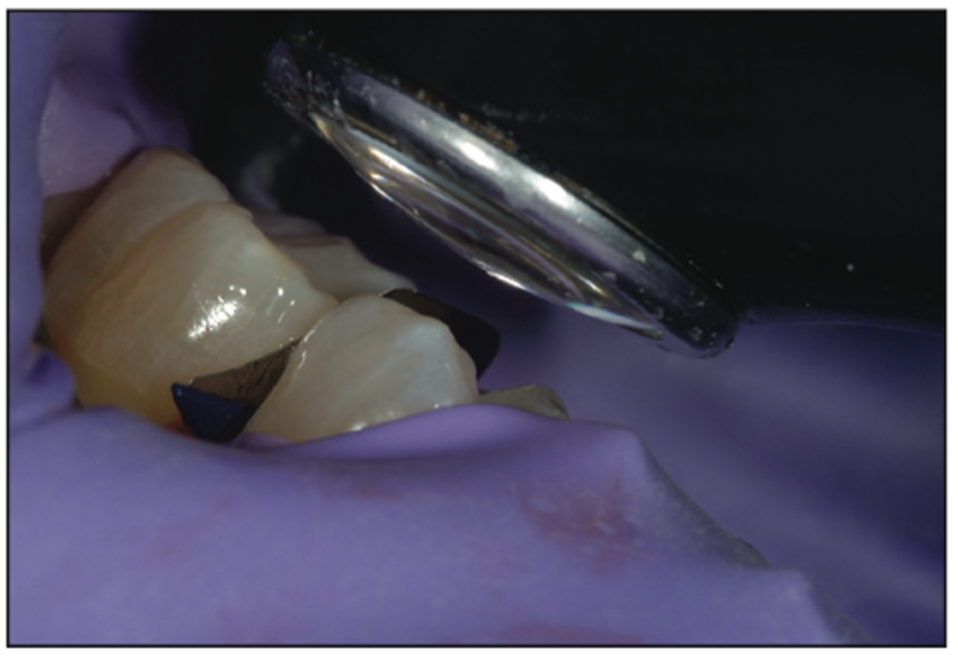
Figure 14. An LED curing light was used to cure the adhesive layer (VALO Grand [Ultradent Products]).

Figure 15. Placement of G-ænial Injectable Composite (GC America).
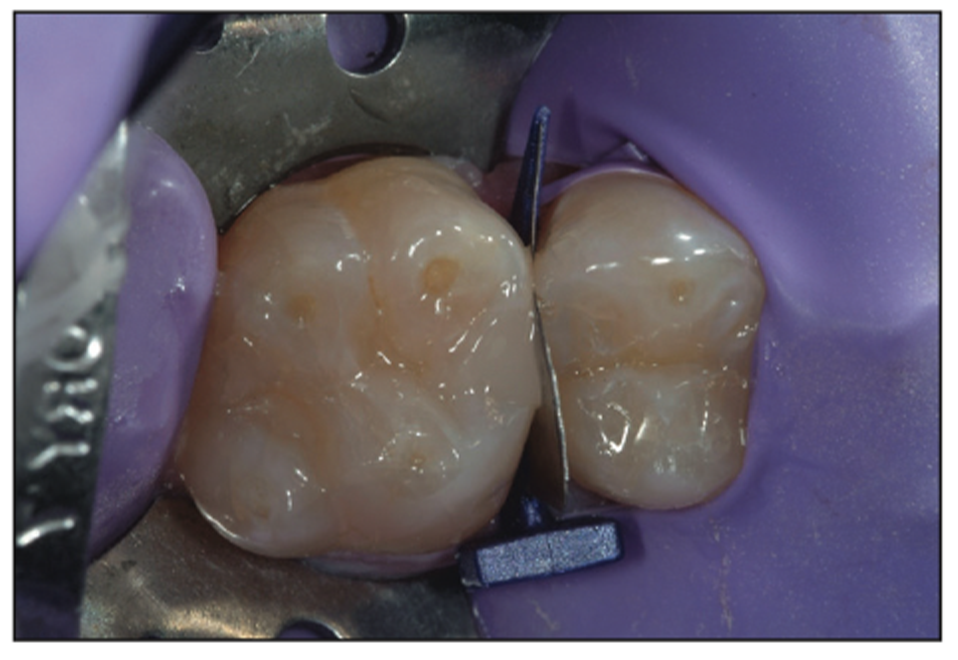
Figure 16. Post curing.
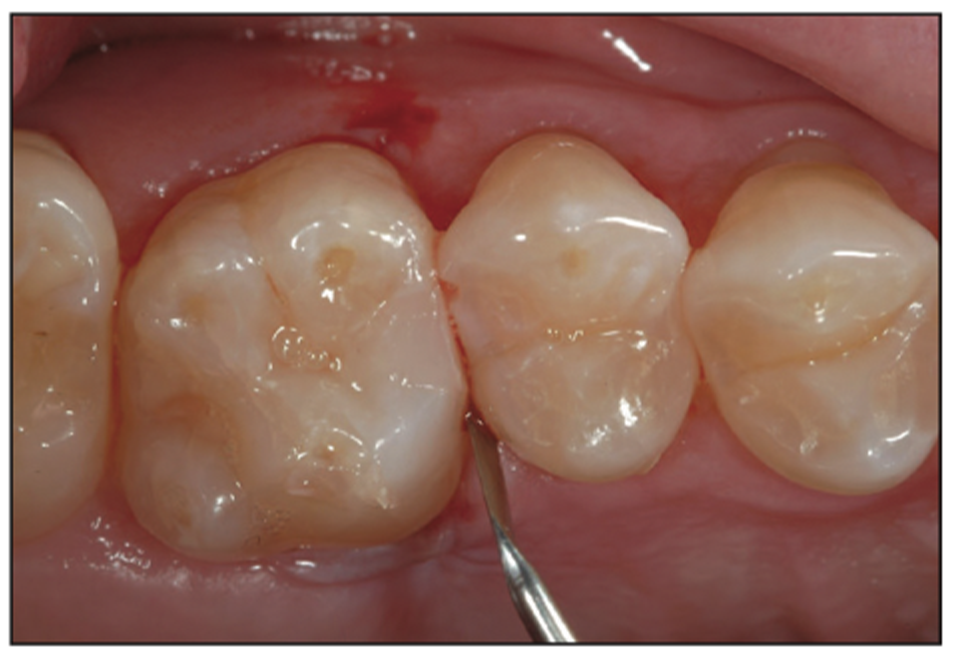
Figure 17. Removal of any flash with the Composite Ninja hand instrument (Clinician’s Choice).

Figure 18. Postoperative photograph of the minimally invasive composite restoration.
Case 3
A 24-year-old presented with radiographic decay (Figure 19). The preoperative photo shows a small sealant or composite in the central groove (Figure 20). A Triodent WedgeGuard (Ultradent Products) was used on the distal to protect the adjacent tooth when preparing the tooth and excavating the decay (Figure 21). For the mesial cavity preparation, the FenderWedge was implemented, producing the same result with no iatrogenic trauma on the mesial (Figure 22).
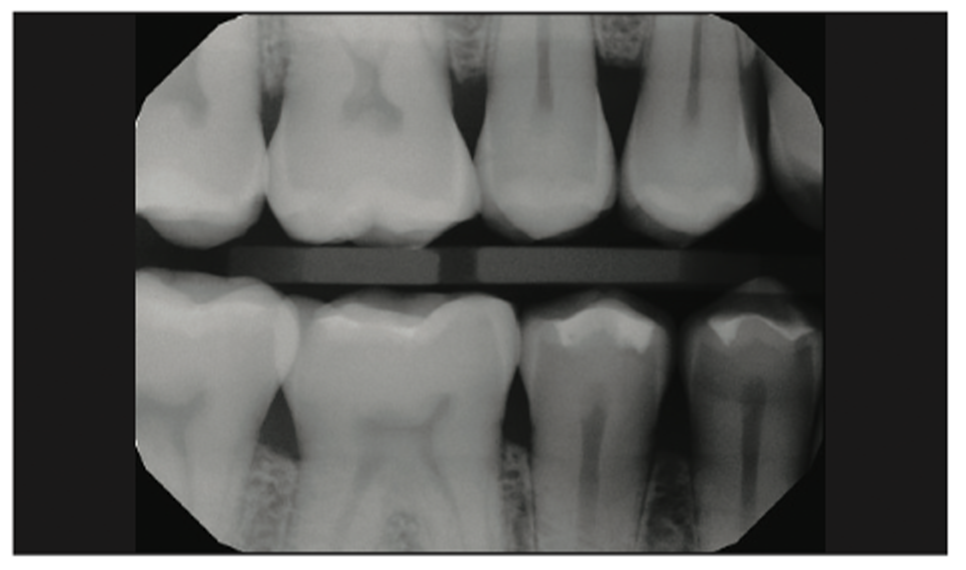
Figure 19. Preoperative radiograph showing decay on the mesial and distal of tooth No. 4.

Figure 20. Pre-op photograph.
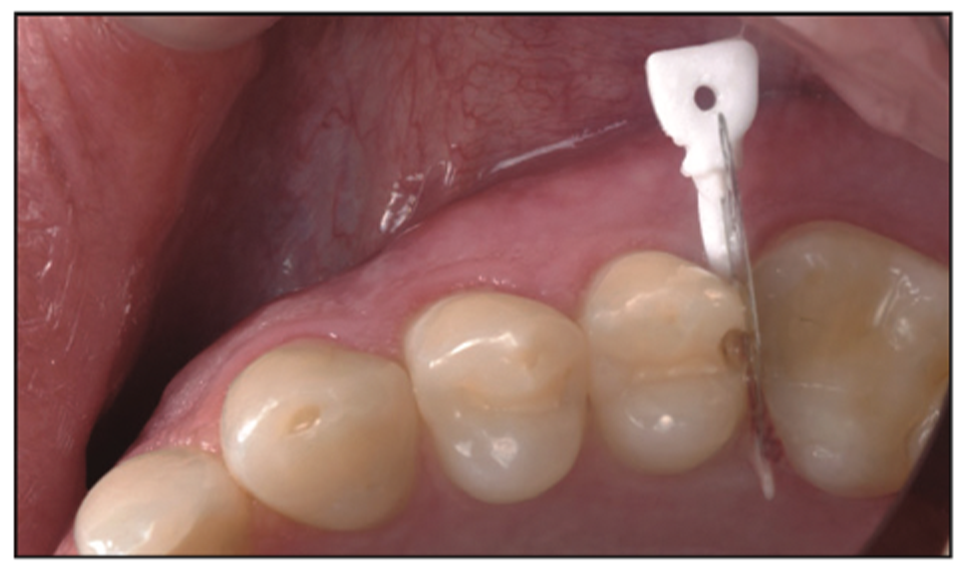
Figure 21. A Triodent WedgeGuard (Ultradent Products) was placed on the distal where decay could still be seen on the gingival floor, but there was no damage to the adjacent tooth.
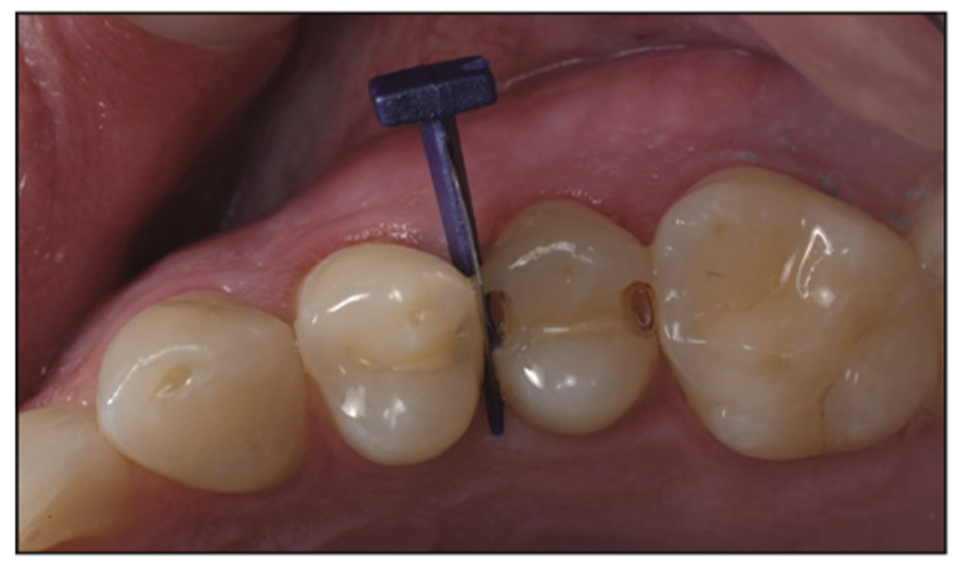
Figure 22. FenderWedge placed on the mesial to prepare the tooth structure and protect the adjacent tooth. A small amount of decay can still be seen.
There are times when you have tight interproximal areas with minimally invasive preparation designs where sectional ring systems won’t fit due to the small size of the preparation and the contour of the matrix. The flat-profile metal shims from various brands of interproximal guards might be considered, but if they don’t contour to the tooth well, there might be a void and a need for a different device—one that is just as easy to place but that has a contour similar to the natural tooth structure to recreate the interproximal contact and provide better adaptation so that there are no voids between the tooth and the matrix device. Recreating the interproximal contact in the correct position and shape can easily be done utilizing the new FenderMate (Directa USA – Division of Directa Dental Group). After using the FenderWedge to protect the adjacent tooth while preparing the tooth and removing the decay, it can be slid out from the interproximal and replaced with the corresponding mesial or distal and thin or thick FenderMate interproximal matrix device.
In this particular case, after placing the FenderMate interproximal matrix on the distal, the cavosurface margins of the preparation design were so close together that traditional techniques to implement compules and syringes used for composite placement would not work due to the small preparation size. This limited access for delivery devices and instruments. Hence, some type of viscous flowable material with a small tip would need to be used to access the gingival floor and proximal cavosurface to restore the tooth without taking more tooth structure away to gain access.
The FenderMate (Figure 23) was implemented to restore the mesial anatomical contour of the tooth without the need for more invasive dentistry to create space for a traditional sectional ring system. The distal FenderMate is contoured to create an anatomical contact without the need for traditional sectional matrix ring systems, and it follows the natural contour of the tooth. The FenderMate comes in both a mesial and a distal anatomical shape that has a recessed contact shape. In addition, both shapes come in 2 sizes: a thicker and a thinner wedge size.
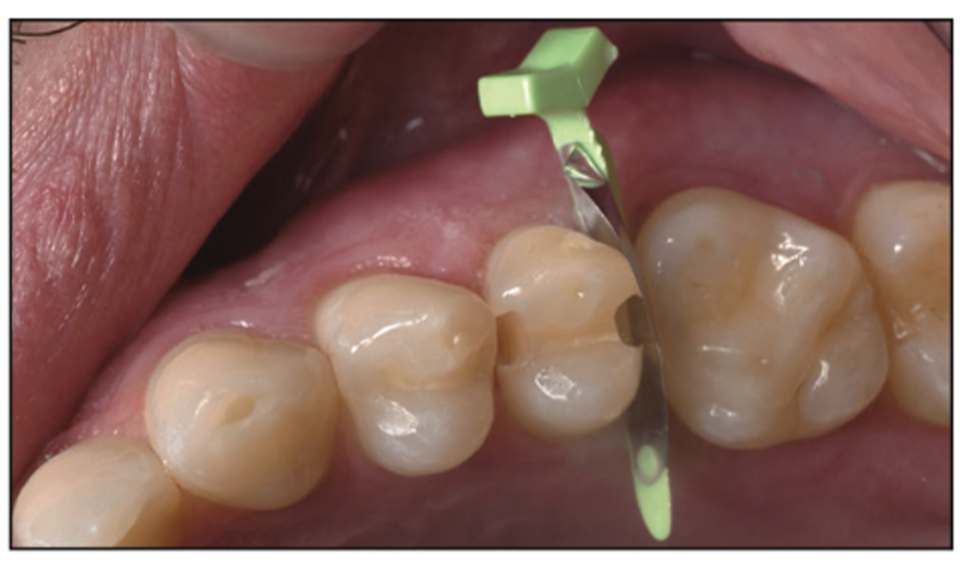
Figure 23. FenderMate (Directa USA – Division of Directa Dental Group) placed to restore the anatomical contour of the tooth distally without the need for more invasive dentistry to create space for a sectional ring system.
The implementation of bioactive materials is also a distinct benefit to the longevity of the tooth. They assist the tooth in fighting off acid attacks from cariogenic bacteria as well as minimizing microleakeage and helping to remineralize tooth structure. One such flowable is Pulpdent’s ACTIVA Presto flowable. This bioactive flowable provides benefits to the tooth that traditional flowables don’t offer. After etching the tooth and placing a universal bonding agent, the Presto bioactive flowable was placed and cured (Figure 24). The mesial was then restored in the same manner using the thin mesial FenderMate. The final minimally invasive restorations were restored with a bioactive flowable with no adjacent iatrogenic trauma.
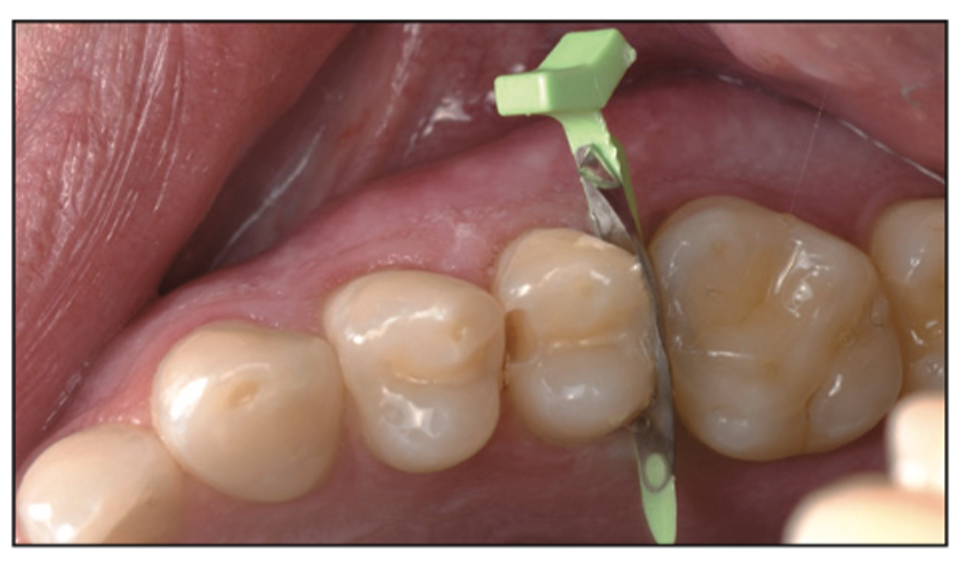
Figure 24. Placement of the ACTIVA Presto (Pulpdent) restoration on the distal.
A 38% phosphoric acid was placed on the entire preparation for 15 seconds and then rinsed away thoroughly, followed by light air drying to maintain moisture in the dentin so as not to cause a collapse of the collagen fibers. Next, a universal bonding agent (All-Bond Universal) was placed following manufacturer protocols and with multiple coatings to be certain that it was thoroughly coated. Then the volatile solvents and water were evaporated carefully using 10 seconds of gentle air from an air-water syringe. This was followed by a 10-second cure using a modern LED curing light (VALO Grand) along with the placement of the bioactive flowable composite (ACTIVA Presto) (Figure 25). The post-op image of the minimally invasive bioactive restoration in place can be seen in Figure 26.
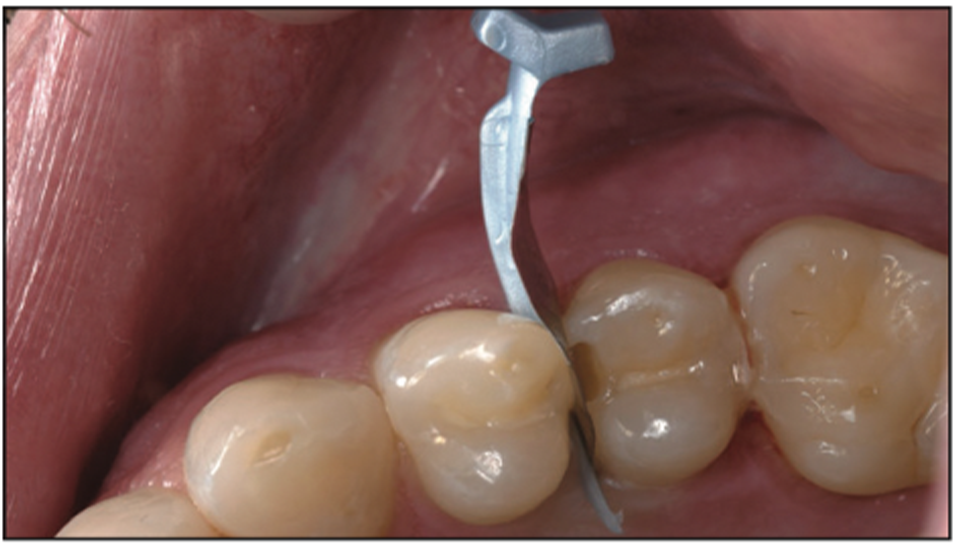
Figure 25. Placement of FenderMate on the mesial.
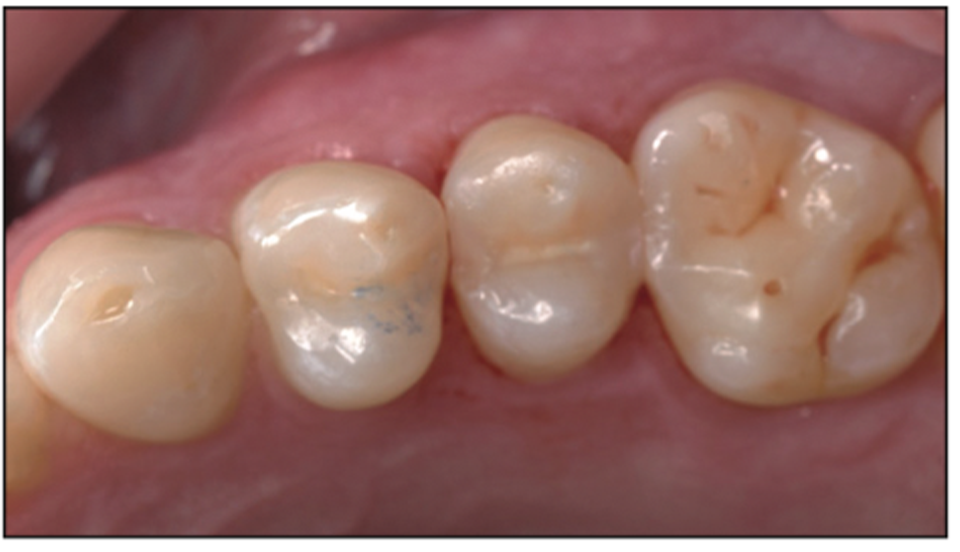
Figure 26. Post-op photo of the tooth restored with bioactive filling material (Presto) after checking occlusion.
Case 4
A 42-year-old patient had some small interproximal decay present on the radiograph of teeth Nos. 4 and 6. Although it was not easy to see it on the radiograph, it was very evident and easier to see with the CariVu, and it was simple to measure and quantify with The Canary System, which showed a value of 34, representing the presence of decay.
This case once again highlights the lack of modern digital radiography to clearly find small cavities (Figure 27). Fortunately, with the help of The Canary System and the CariVu intraoral camera, we can easily find pathology before it spreads and consumes more tooth structure and requires more invasive dental procedures. The CariVu imagery helps us visualize where the decay actually is within the tooth so that we can take out just the damaged area of tooth structure (Figures 28 and 29).
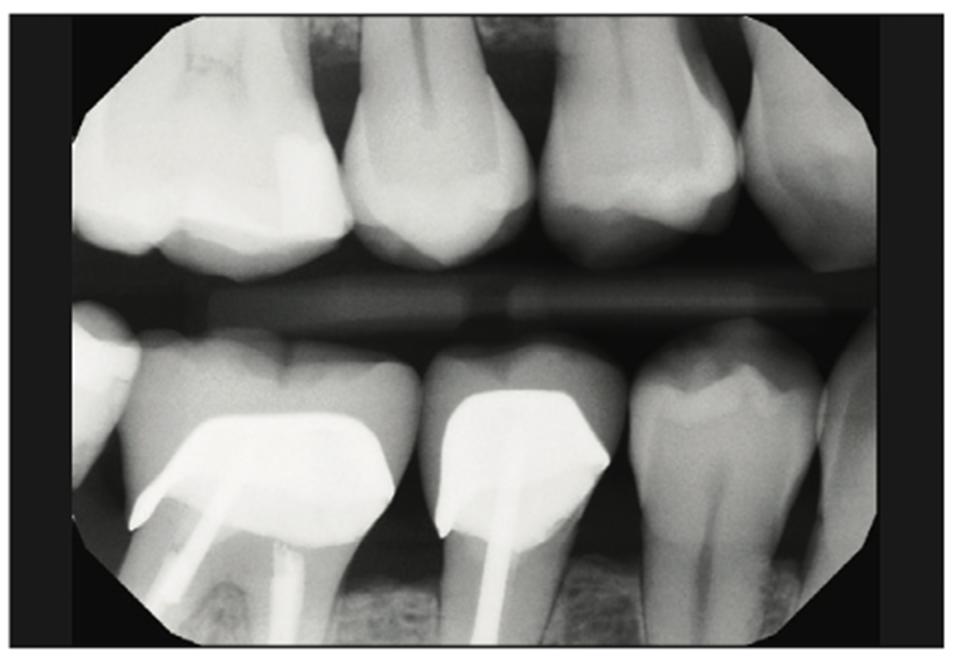
Figure 27. Pre-op radiograph of teeth Nos. 3 to 6.
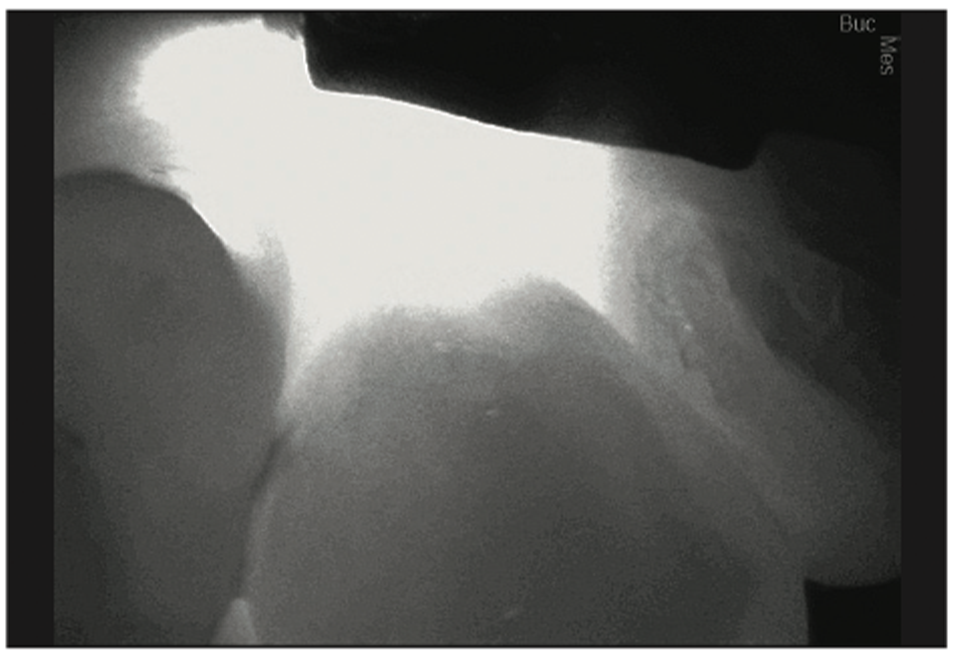
Figure 28. Pre-op CariVu image of distal decay on tooth No. 6.

Figure 29. Pre-op CariVu image of mesial decay on tooth No. 4.
Utilizing the same techniques mentioned previously, we placed a wedge guard between the teeth, followed by the removal of damaged tooth structure. We then double-checked the tooth using a caries indicator (Kuraray) (Figure 30). Once the decay is removed, no additional tooth removal is necessary thanks to the new interproximal devices. We can then start to place our composite systems as outlined previously or utilize another modern bioactive restorative material. In this case, we chose to implement a bioactive material that does not need any etchant or adhesive resins. Ceramir Restore (Doxa Dental) (Figures 31 and 32) is a modern bioactive material that provides the benefit of being able to work in a moist environment, and once placed, it protects the tooth from acid attacks while also creating hydroxyapatite.

Figure 30. Pre-op Triodent WedgeGuard in place for mesial proximal box preparation.
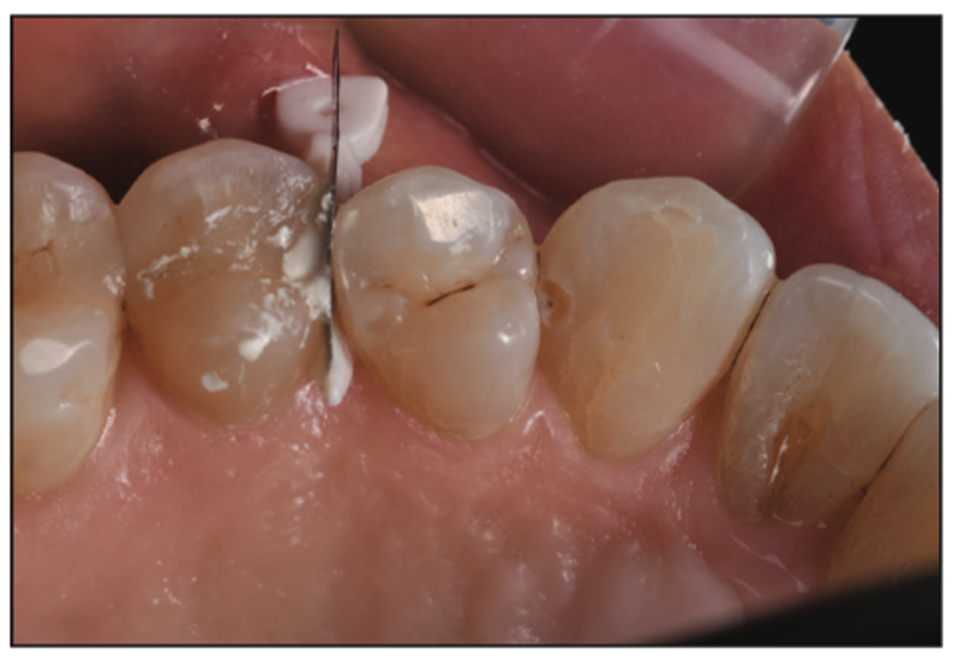
Figure 31. The Triodent WedgeGuard still in place as a matrix and it will be used to place the Ceramir Restore in the distal cavity preparation located on tooth No 6.
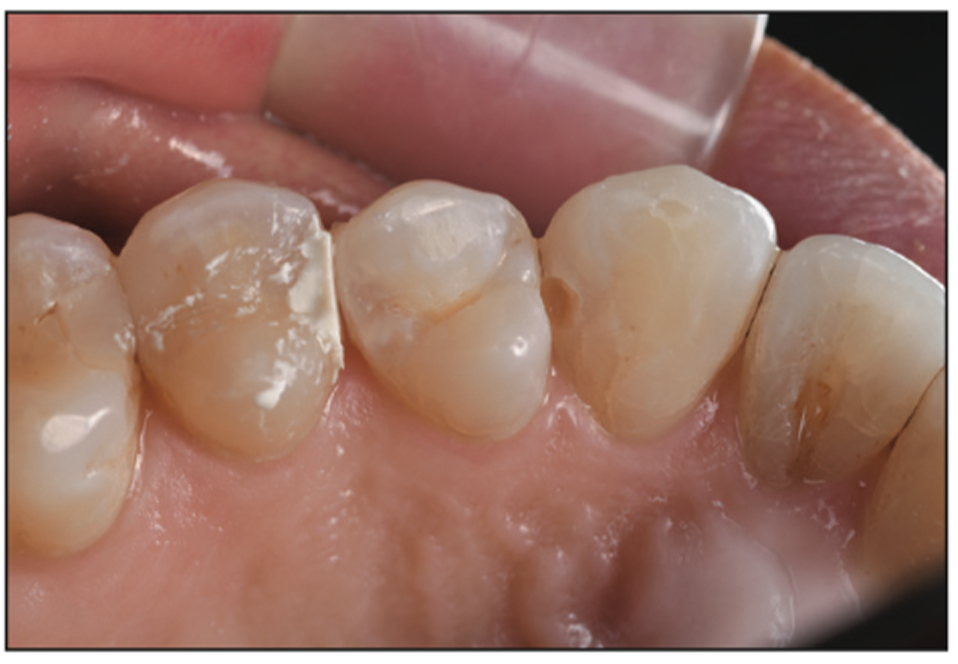
Figure 32. Tight contact achieved once the Triodent WedgeGuard is removed prior to cleanup.
Upon completion of placing the restoration, a new articulating paper was implemented to evaluate the occlusion and to ensure the restorative material had light little to no occlusal forces on it (Figure 33). TrollFoil 4.5-μm articulating paper (Troll Dental – Directa Dental Group) is the thinnest and most accurate material on the market. Because of how thin the articulating paper is, it creates less potential erroneous markings that could mislead the practitioner as to where to adjust the occlusion. The occlusal adjustment was done with a 30-fluted carbide bur, followed by polishing with various impregnated rubber points and cups. Lastly, we checked the interproximal area for flash using a Composite Ninja interproximal bladed hand instrument (Figure 17), followed by flossing to check the tightness of the contact. If adjustments were necessary, a ContacEZ interproximal strip (ContacEZ – Division of Directa Dental Group) could be used to take a small amount of restorative material without damaging the adjacent tooth, as some of the company’s diamond-coated interproximal strips are coated only on one side. The plastic handle simplifies the procedure compared to long proximal strips that can sometimes cause trauma to adjacent tissues and lips if one is not careful. You can see the final bioactive Ceramir Restore restorations in place in Figure 34.
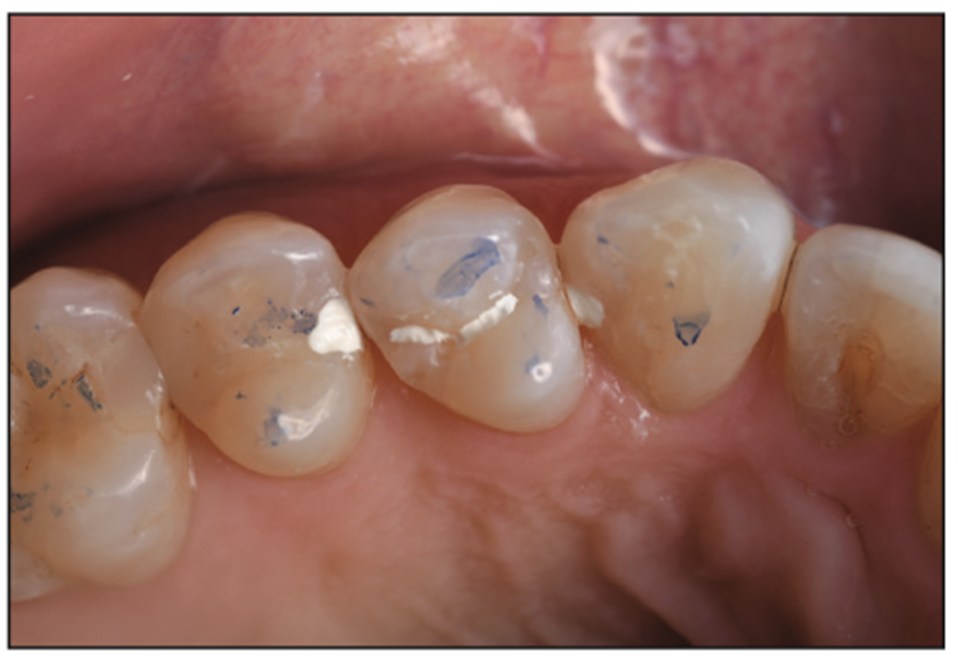
Figure 33. Post-op Ceramir Restore material in place and polished, followed by checking the occlusion.
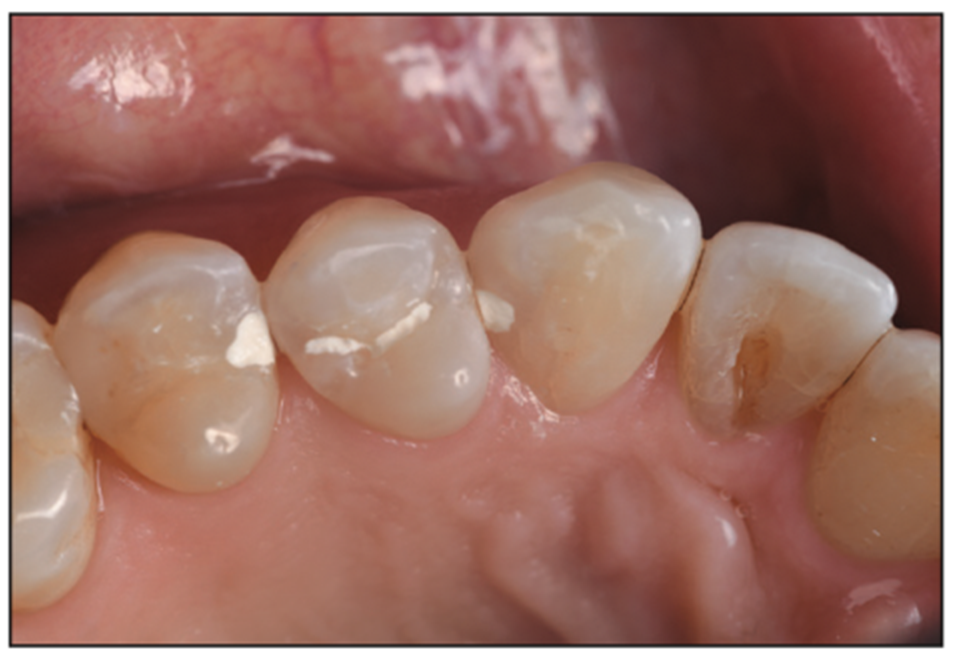
Figure 34. Post-op view of the minimally invasive, bioactive restorative fillings.
DISCUSSION
There are a lot of factors to consider in today’s economic environment as office overhead, rent, materials, employees, and other costs of business continue to rise along with current increases in inflation. The win is to find tooth decay earlier for our patients to necessitate less invasive treatment so that they can hopefully maintain more tooth structure for the rest of their lives and have less occlusal loading and stress on their restorations. This will also allow dentists to make smaller preparations necessitating less time and materials, which is a side benefit of the minimally invasive mindset.
CONCLUSION
In conclusion, the techniques, preparation designs, devices, and materials we have used previously continue to evolve into better, stronger, more durable materials that can help us heal a tooth internally and fight off external bacterial microleakage and pH challenges. Combined, all of this allows dentists to conserve more tooth structure than ever before while, at the same time, providing the potential for a longer-lasting filling material due to improved physical properties that also feature less occlusal loading due to the smaller restorative footprint. Utilizing newer materials that offer bioactive properties can also help strengthen the tooth to increase its longevity by fighting off acid attacks and reducing demineralization and microleakage. These newer materials and devices can certainly benefit the patient as well as the dentist in many ways.
ABOUT THE AUTHOR
Dr. Snyder graduated from the University of California, Los Angeles (UCLA) School of Dentistry and the F.A.C.E. institute. He created/co-directed the first ever 2-year graduate program in aesthetic and cosmetic dentistry while at UCLA. He is the 77th Accredited Fellow of the American Academy of Cosmetic Dentistry, a Diplomate of the American Board of Aesthetic Dentistry, and a Fellow in the International Academy of Dental Facial Esthetics. He is an international author, lecturer, and consultant to dental companies. Dr. Snyder owns a software company and an online dental training program at the website legion.dentist. He hosts the weekly podcast Delusional: Winning the Weekly War of Dentistry. Dr. Snyder is also a professional race car driver and an entrepreneur. He practices cosmetic and restorative dentistry in both Laguna Niguel, Calif, and Las Vegas. He can be reached at drtoddsnyder.com.
Disclosure: Dr. Snyder reports no disclosures.