

In the previous article in this series, “The Ultimate Root Canal Playbook: Part 1” (Dentistry Today, June 2021), I discussed how root canal treatment is a 4-quarter game—not a game of inches, but a game of millimeters. I outlined the abbreviated RCT playbook that I incorporate in my practice to achieve effective, efficient, and excellent endodontics. In the final installment of this article, I pick up in the second half of the RCT game and discuss shaping and obturation.
Third Quarter of the Root Canal Game
We will use the molar No. 19 (Figures 1 to 3) as the example for these final steps.
Figure 1. Preoperative radiograph of tooth No. 19.
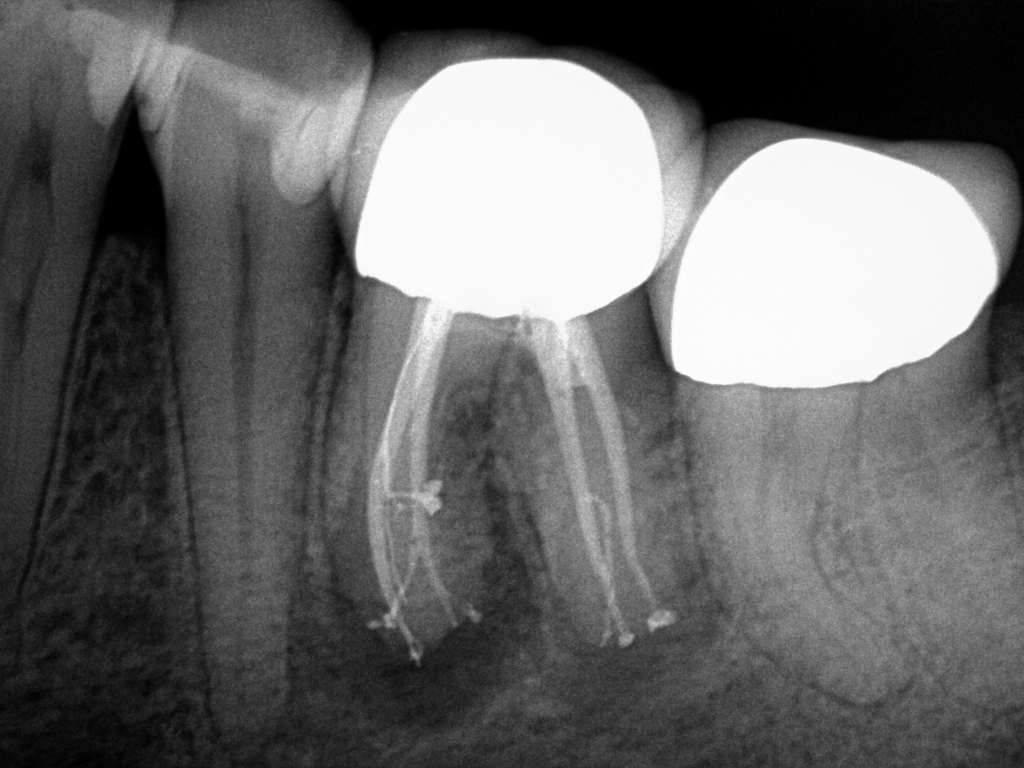
Figure 2. Postoperative photo following use of ProTaper Gold (Dentsply Sirona Endodontics).
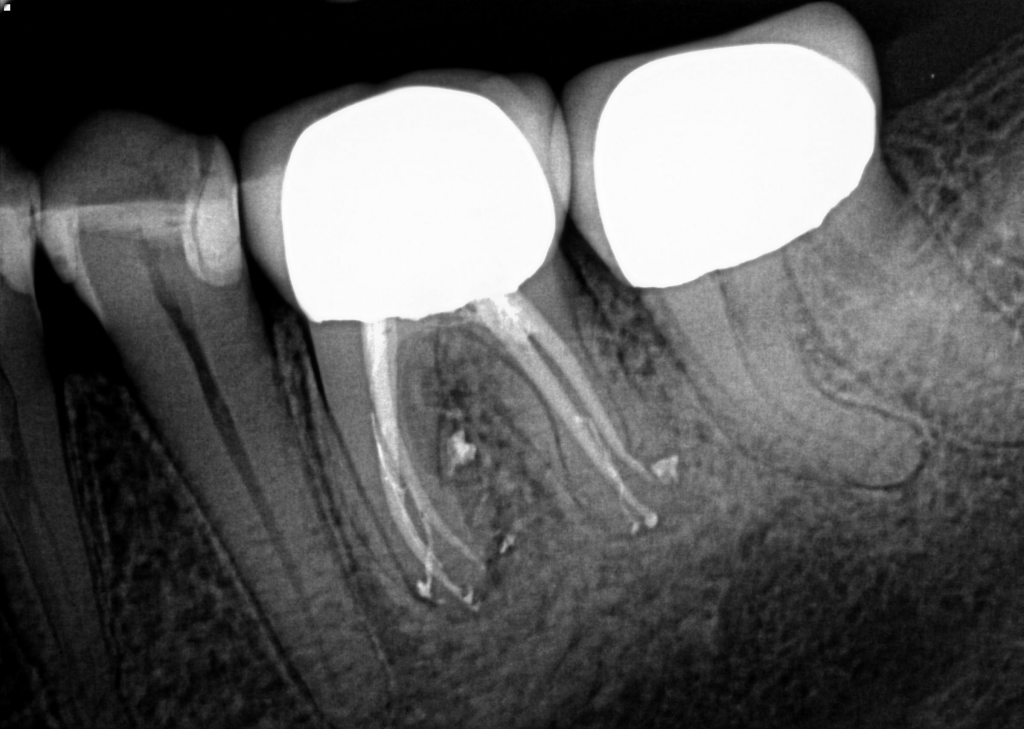
Figure 3. Recall at 18 months.
Shaping: This ensures the removal of vital or necrotic pulp tissue and enables the sodium hypochlorite and, later, QMix (Dentsply Sirona Endodontics) to work in the canal and extend down to the apex. Shaping also opens the canals enough for obturation.
The best part about this RCT playbook is that you can use any orifice opener, glide path file, or set of shaping files. Just choose your desired file system. I use ProTaper Gold (Dentsply Sirona Endo-dontics) (Figure 4) and WaveOne Gold (Dentsply Sirona Endo-dontics) in my practice. I have completed thousands of cases with these file systems and have achieved excellent shaping results.
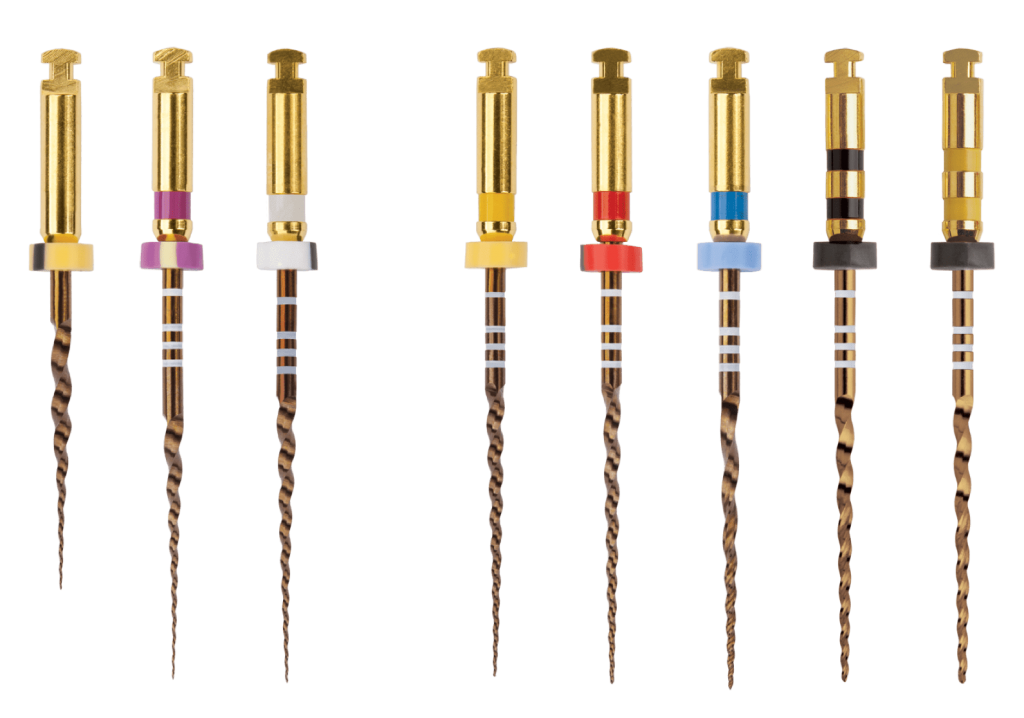
Figure 4. ProTaper Gold.
Once you have completed the middle flare and glide path with the ProTaper Gold Shaper 1, move on to the ProTaper Gold Shaper 2 (Figure 5). Gently work this to length using 4 to 5 engagement/disengagements. At this point, it will slide and glide to working length easier than the S1, but it still may take 1 to 2 passes of 4 to 5 engagement/disengagements. The S1 is your workhorse and does a lot of what I call the “hard” shaping. Irrigate out the debris with sodium hypochlorite and recapitulate (negotiate to patency) with a #10 K-file. Always shape with bleach in the canals. Never shape dry.
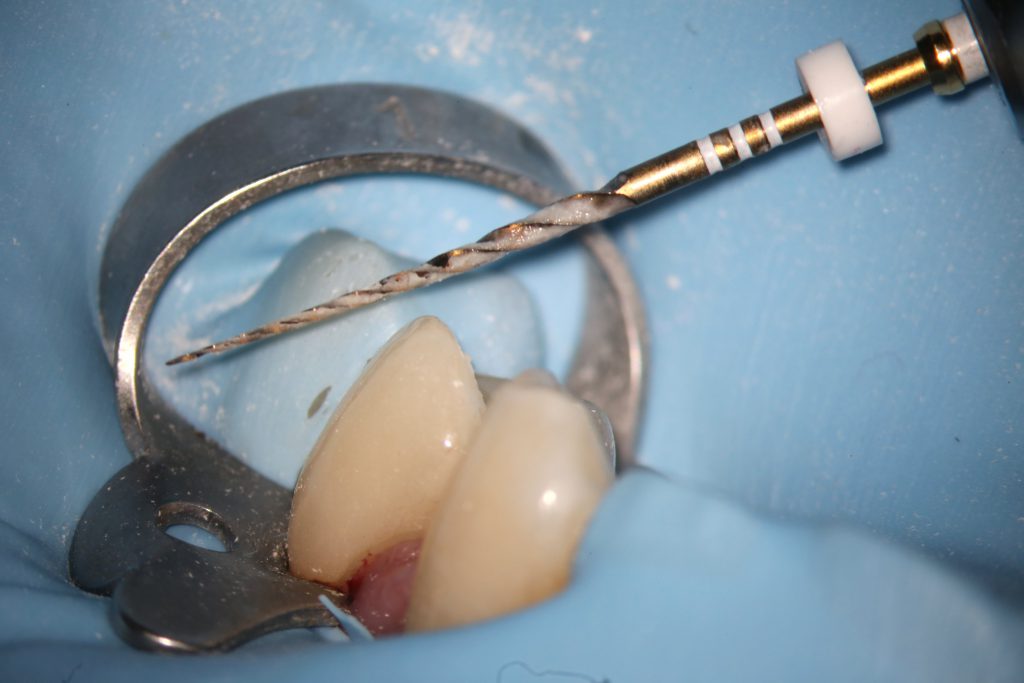
Figure 5. ProTaper Gold S2.
Once the S2 reaches working length, proceed to the ProTaper Gold Finisher 1 (#20 tip) (Figure 6). This will usually fly to working length. These files shape the apical third and create a deep apical shape. If it’s a tight, twisty, curved canal, you can finish the shape with the F1, but since I am talking about “simple” root canal treatment, I usually finish with the ProTaper Gold Finisher 2 (#25 tip). In the same manner, work the F2 down to working length with 4 to 5 engagement/disengagements or slow in-and-outs. It may take one pass, or it may take 2 to 3. Take your time. Once you get to working length, gently run the F2 two to 3 times at or near working length to obtain a deep apical shape. Many dentists just “peck” the apex with their last shaping file and then wonder why the matching gutta-percha cone doesn’t fit to length or fits 2 mm short. Don’t be afraid to gently shape the apex. This will give you a deep apical shape, clean the apical foramen, and allow the cone to fit down to working length. Remove the Finisher 2 from the canal and inspect the end of the file. Are the flutes full of dental debris? If they are, then you are done shaping and do not need to upshape to the ProTaper Gold Finisher 3.
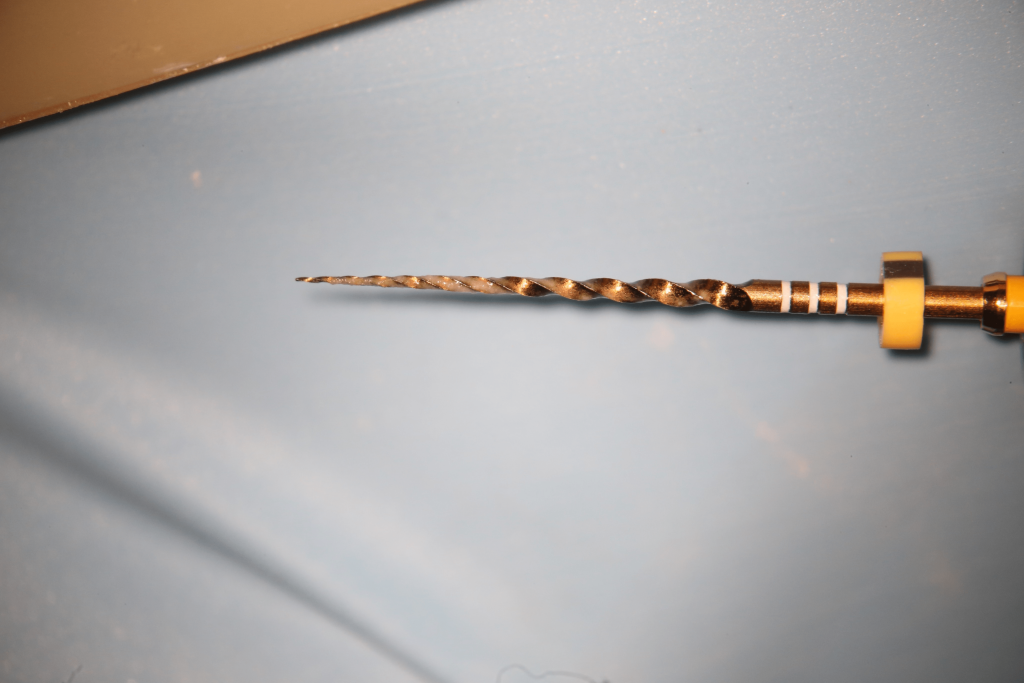
Figure 6. ProTaper Gold F1.
Apical verification: This ensures that you have a deep apical shape and that the cone will fit to working length.
Once shaping is complete, gently verify the apical shape. If you finished with a ProTaper Gold F2 (#25 tip), select and place a #25 K hand file to working length. If it fits snugly to working length without much resistance and does not extend past working length, then apical shaping and verification are complete. If the #25 K-file stops 2 mm short of working length, you have not shaped the apical third adequately, and the soft gutta-percha cone will also stop 2 mm short of working length. Go back and reshape the apex. The easiest way to do this is to use the #25 K hand file in a reciprocating motion and gently advance it down to working length. If the #25 file won’t extend down to working length, remove it, irrigate, recapitulate with a #10 K-file, and work your way from a #15 to a #20 and finally back to a #25 K-file. You can also reshape the apical third with the ProTaper Gold F2.
Once you feel that apical verification is complete, use the EndoActivator (sonic activation) (Dentsply Sirona Endodontics) with bleach in the canals and run it for 1 minute per canal. This enhances chemical disinfection and stirs up the bleach piranhas to eat more tissue and microbes.1
Fourth Quarter of the Root Canal Game
Conefit: This ensures that the cones fit to the proper working length and are not seated short or long.
This step is often hurried through because you are now running out of treatment time, and the next patient is waiting in another treatment room.
Still, take the appropriate time to perform a good conefit with quality cone-fit radiographs. Select the matching gutta-percha cone. In this case, select the micronized, conform fit ProTaper Gold F2 cones and place them into each canal one at a time. When they stop advancing, crimp the cone with cotton pliers at the reference point, and then remove the cone and measure to see if it advanced down to the correct working length. If a cone fits 1 mm long, then use scissors to cut 1 mm off the tip. If a cone fits approximately 1 mm short, then go back and gently shape to working length with a #25 K-file or the ProTaper Gold F2 file.
Once you feel that the cones fit to the correct working length, place them back in the canals that are soaking with bleach and take a straight and a shift periapical radiograph. If the cone is right at the radiographic working length, then trim approximately 0.5 mm off the tip. If you are long, then cut back the appropriate length. Be as exact as possible here, and do not cut off too much of the cone. Keep at it until you have an excellent conefit (in the real world, this should just take minutes to achieve as long as you have shaped well).
Final disinfection: Now, remove the cones and suck out the bleach with a micro-vacuum or use paper points and irrigate with the final solution, QMix 2in1. QMix is a 2-in-1 irrigant that consists of EDTA and chlorhexidine2 (Figure 7). This 2-in-1 solution removes the smear layer that forms circumferentially on the canal wall from shaping with the EDTA component and then provides a substantivity antibacterial effect with the chlorhexidine component.3 I have been using QMix for more than 5 years in my practice. The theory is that the EDTA removes the smear layer, and then the chlorhexidine can enter the exposed and open dentinal tubules and kill any hiding microbes. Dentinal tubules are essentially little caves that bacteria, viruses, and fungi can hang out in.3

Figure 7. Mix 2in1 Irrigating Solution (Dentsply Sirona Endodontics)
Place QMix with a side-vented needle and sonically agitate the QMix with the EndoActivator in each canal for 30 seconds4,5 (Figure 8). Leave the QMix in the canals for at least one minute to remove the smear layer. Recapitulate one last time with a #10 or #15 K hand file.
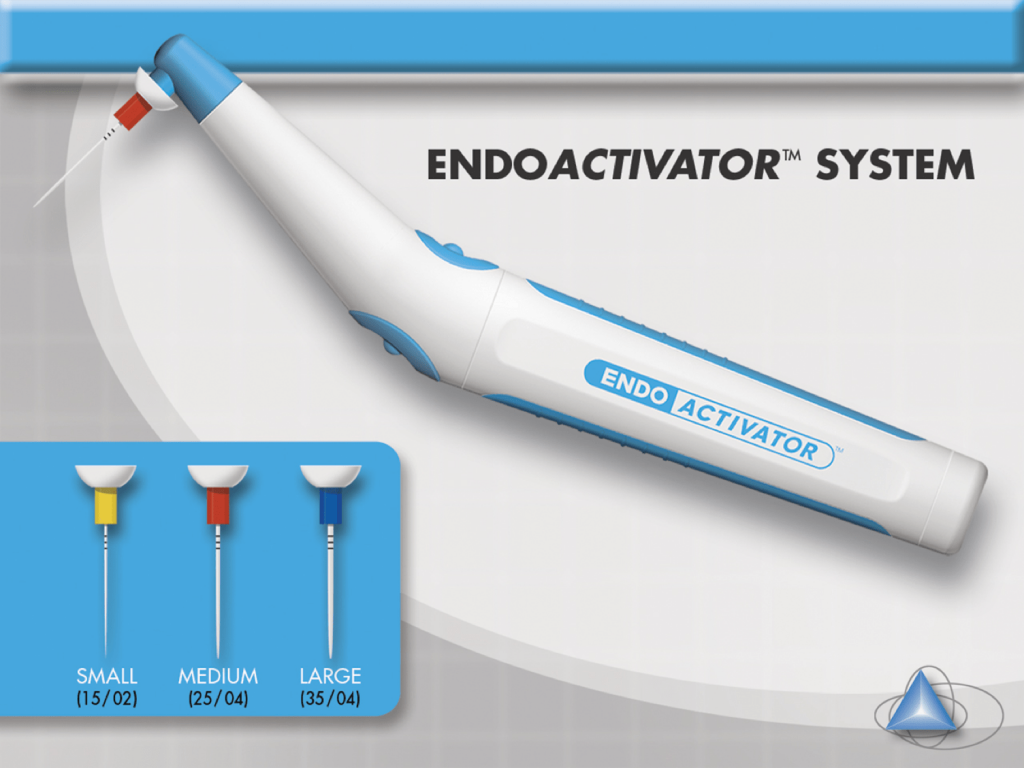
Figure 8. EndoActivator System (Dentsply Sirona Endodontics).
Paper points: This ensures the canals are dry, especially in the apical third.
Use a micro-vacuum (I prefer the EndoVac MacroCannula [Kerr Endo-dontics]) to suck out the QMix from all of the canals, and then dry with paper points. For efficiency, use the corresponding ProTaper Gold F2 paper points. You can also use any standard paper points. A good rule that I use in my practice is to use medium paper points if I finished the shape with a ProTaper Gold F1, coarse paper points if I finished with an F2, and extra coarse if I finished with an F3.
Warm Vertical Obturation: This ensures that you achieve a 3D “hermetic” seal.
Finally, it is time to fill and seal the shaped and cleaned canals. The goal of obturation is to 3-dimensionally hermetically seal the apex so microbes can’t escape or enter the root canal system. There are 4 ways to obturate a canal: (1) cold lateral, (2) warm vertical, (3) thermoplastisized gutta-percha (GuttaCore [Dentsply Sirona Endodontics] or Thermafil [Dentsply Sirona Endo-dontics]), and (4) single cone using a calcium silicate sealer like BC. In this article, we will focus on warm vertical obturation.
Pick up the “fitted and measured” gutta-percha cone with cotton pliers and butter the apical third with your preferred sealer (I use either Pulp Canal Sealer [Kerr Endodontics] or Ribbon Root Canal Sealer [Dentsply Sirona Endodontics]). Carefully place the buttered cone into the canal and gently push it down toward working length. Make sure the cone seats down to working length by checking that the crimped part of the cone is at the reference point. I then use the Gutta-Smart heat tip (Dentsply Sirona Endodontics) (Figure 9) or the EndoPro 270 (Brasseler USA) at 200℃ to “burn out” the coronal two-thirds part of the cone, leaving a 5-mm apical gutta-percha plug. To perform this technique, I prefer the black-sized tip for the Gutta-Smart heat tip or the 45/04 tip for the EndoPro 270. They are smaller and fit better into premolar and molar canals. Be gentle when using the heat tip. If it does not fit down to within 5 mm of working length, that is ok. Do not force it down the canal. Just go as far as it allows with the ideal goal of extending the heat tip to within 5 mm of working length. This allows the heat to travel down the 5-mm gutta-percha plug and to the apex. Select a small plugger (I prefer the Dovgan Pluggers with the white/green end [Prime Dental Supply]), dip the end into the sealer, and then gently tap or push on the softened, 5-mm apical plug and mold it into the irregularly shaped foramen. The goal is to obtain a nice, tight hermetic seal (in theory) and to prevent any microbial leakage.
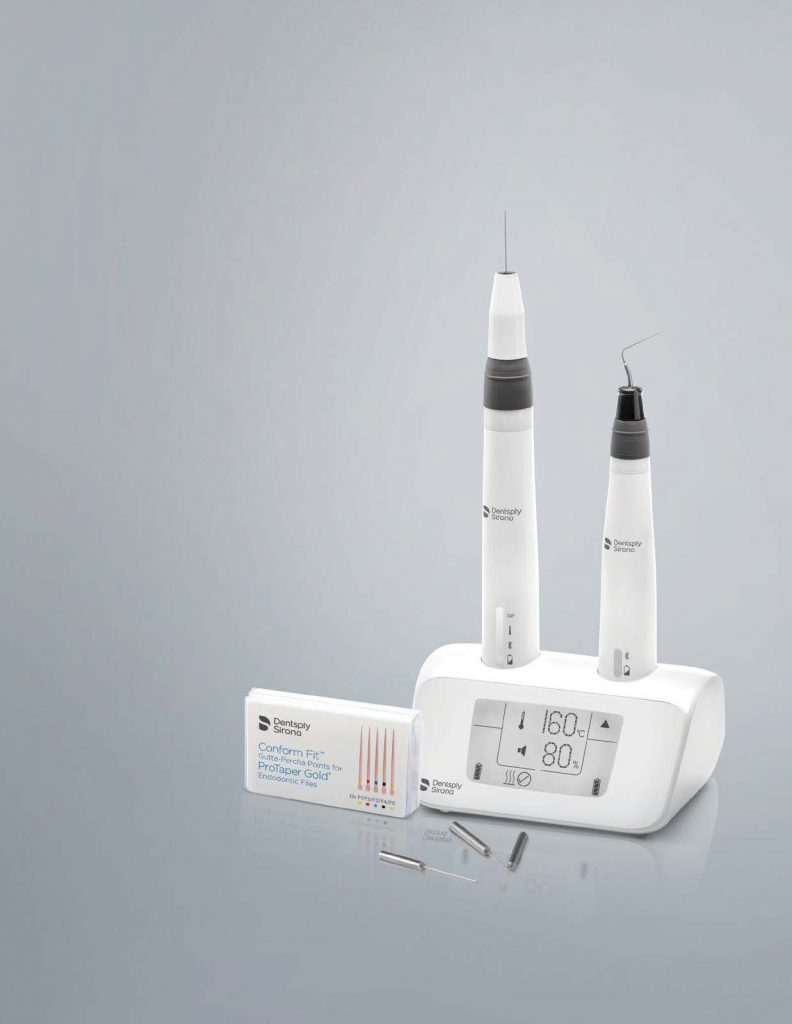
Figure 9. Gutta-Smart (Dentsply Sirona Endodontics)
Backfill the coronal two-thirds of the canal with the Gutta-Smart Obturation Handpiece 25-ga tip (or any preferred backfill device). Place the 25-ga tip on top of the 5-mm apical gutta-percha plug, and slowly extrude the heated gutta-percha. Go slowly and allow the Gutta-Smart to push you out of the canal. I typically backfill the entire canal up to the orifice level in one shot. Select a larger plugger (Dovgan, black/blue end) and tap the gutta-percha down right at the orifice. Clean the extra sealer off the pulp chamber floor and walls with a small chloroform pellet, followed by alcohol (Pulp Canal Sealer) or just an alcohol pellet (Ribbon Root Canal Sealer).
Whew! This root canal is finally done. This is one for the books!
CONCLUSION
Follow the root canal playbook to achieve effective, efficient, and excellent root canals (or, what I like to call E3 Endodontics). It will take practice, practice, practice, and a few missteps, but keep at it, and you will achieve endodontic success.
REFERENCES
1. Pasqualini D, Cuffini AM, Scotti N, et al. Comparative evaluation of the antimicrobial efficacy of a 5% sodium hypochlorite subsonic-activated solution. J Endod. 2010;36(8):1358-60. doi:10.1016/j.joen.2010.03.035
2. Kara Tuncer A. Effect of QMix 2in1 on sealer penetration into the dentinal tubules. J Endod. 2015;41(2):257-60. doi:10.1016/j.joen.2014.10.014
3. Azim AA, Aksel H, Zhuang T, et al. Efficacy of 4 irrigation protocols in killing bacteria colonized in dentinal tubules examined by a novel confocal laser scanning microscope analysis. J Endod. 2016;42(6):928-34. doi:10.1016/j.joen.2016.03.009
4. Arslan D, Guneser MB, Dincer AN, et al. Comparison of smear layer removal ability of QMix with different activation techniques. J Endod. 2016;42(8):1279-85. doi:10.1016/j.joen.2016.04.022
5. Caron G, Nham K, Bronnec F, et al. Effectiveness of different final irrigant activation protocols on smear layer removal in curved canals. J Endod. 2010;36(8):1361-6. doi:10.1016/j.joen.2010.03.037
ABOUT THE AUTHOR
Dr. Pullen graduated from the University of Southern California Dental School in 1999 and completed a one-year AGD residency in Landstuhl, Germany, while in the US Army. He practiced as a general dentist for 5 years before attending the Long Beach VA Endodontic residency and graduating in 2006. Dr. Pullen started his own private practice in Brea, Calif, in 2007 and became board-certified in endodontics in 2013. He has 3 kids and enjoys surfing, reading, Brazilian jiu-jitsu, and hanging out with his wife and kids. Dr. Pullen runs both the live 2 Day Root Camp Boot Camp and rootcanalacademy.com online courses. He can be reached via email at reidpullen@rootcanalacademy.com.
Disclosure: Dr. Pullen lectures for Dentsply Sirona.